Multi-Language
What if you want to sell overseas or serve other nations apart from domestic markets? A localized version of your store is needed to meet customers' demands and gain reasonable conversion rates. Magento 2 allows you to implement a multi-language store with a single instance. Follow the process as narrated below. But before moving further, understand the difference between having multiple store views and a multi-website. The picture below shows how they differ.
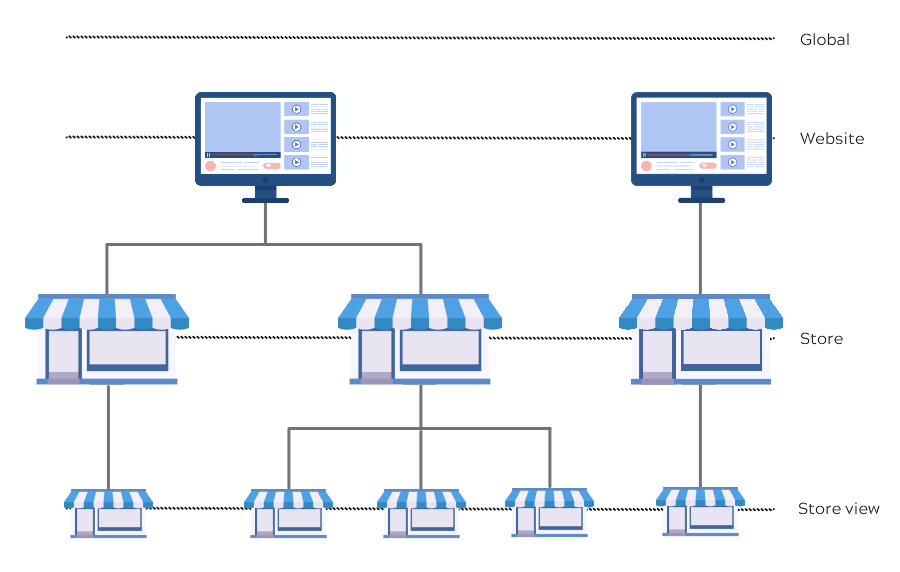
Of the three options, first, you need to decide which one you would like to opt for.
-
Separate website – Having this method, you will get a new website with a unique name, and then you can assign multi-stores and store views to it.
-
The new store – You can create a brand new store under the same website. This option is helpful if you plan to have the local version and way beyond it.
-
A localized store view – The most straightforward way is to add a new store that allows you to present your store in a local version (ground level changes).
You must perform some manual process for any of the options you select.
Let's say if you want a new website, you need to create a website, add the store, and then a store view. Add a store and store view if you choose to have a new store to your existing website. Or simply have the localized version by creating a store view.
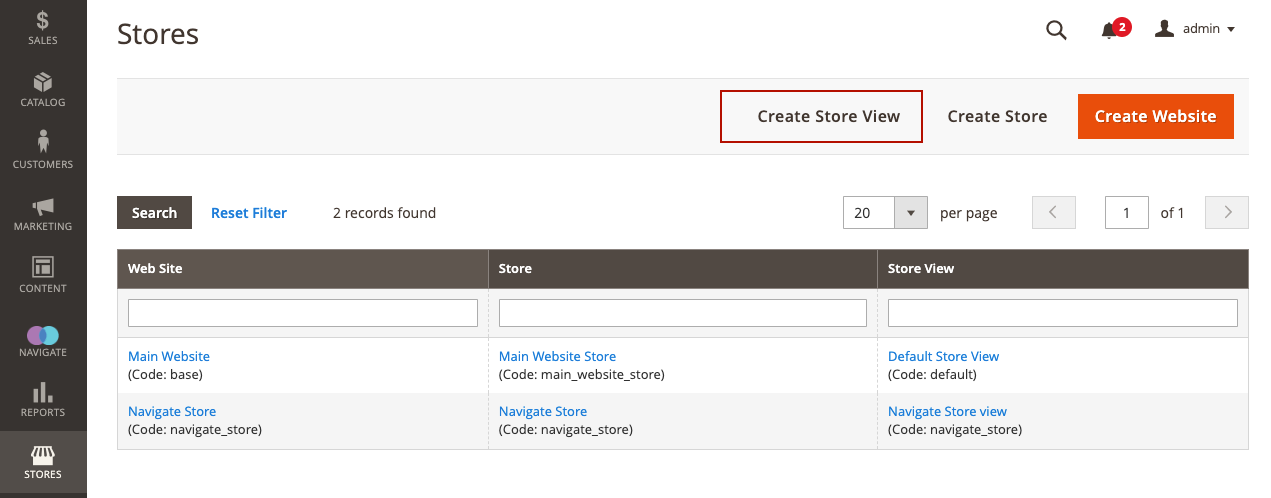
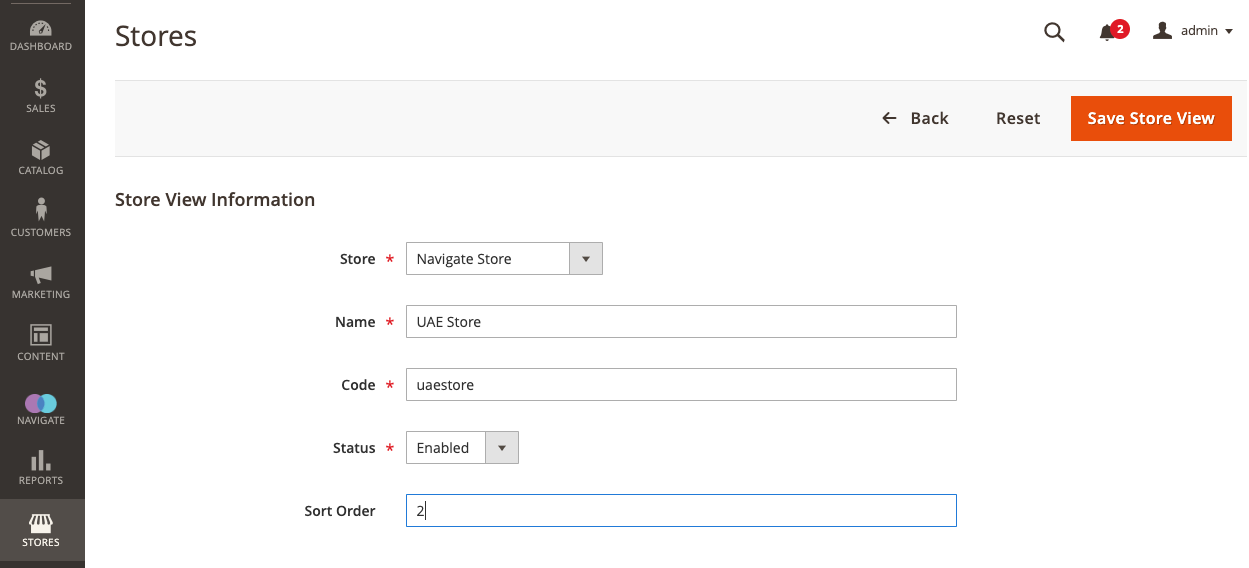
To create a new store view, Navigate to your Magento 2 admin panel, select the stores tab, choose the All Store Option and click the Create Store View button. Now, you need to add the website to assign this store view and also need to fill in the name and the code of the chosen website. Next, you need to enable this store view and define the sorting order. Once done, click the Save Store View button.
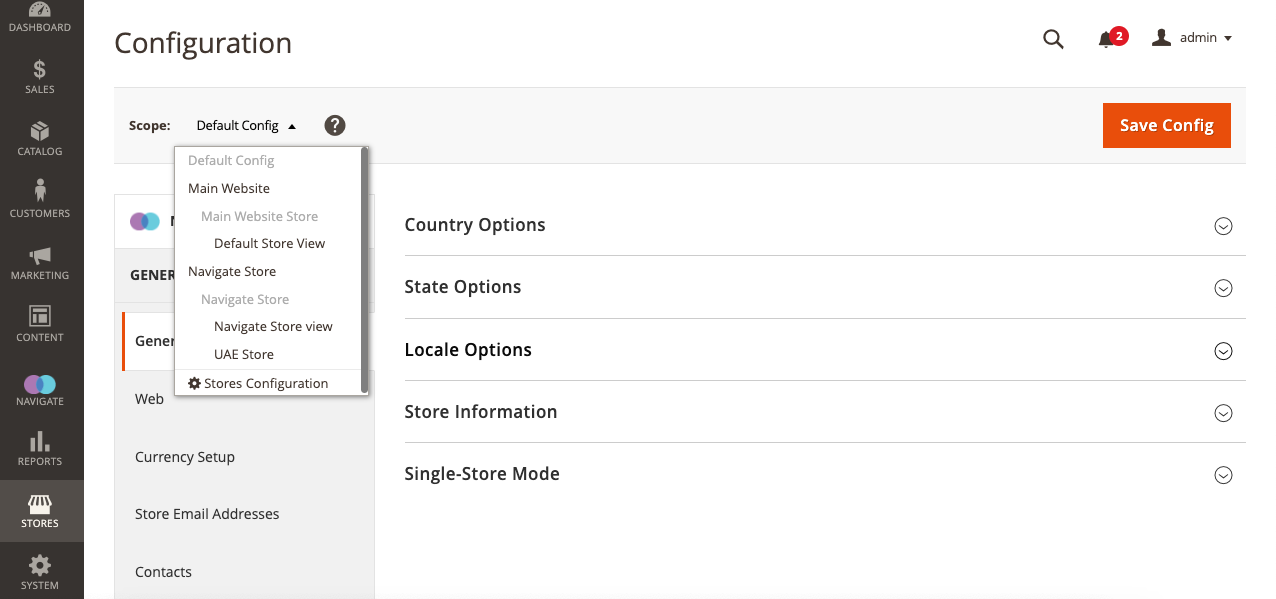
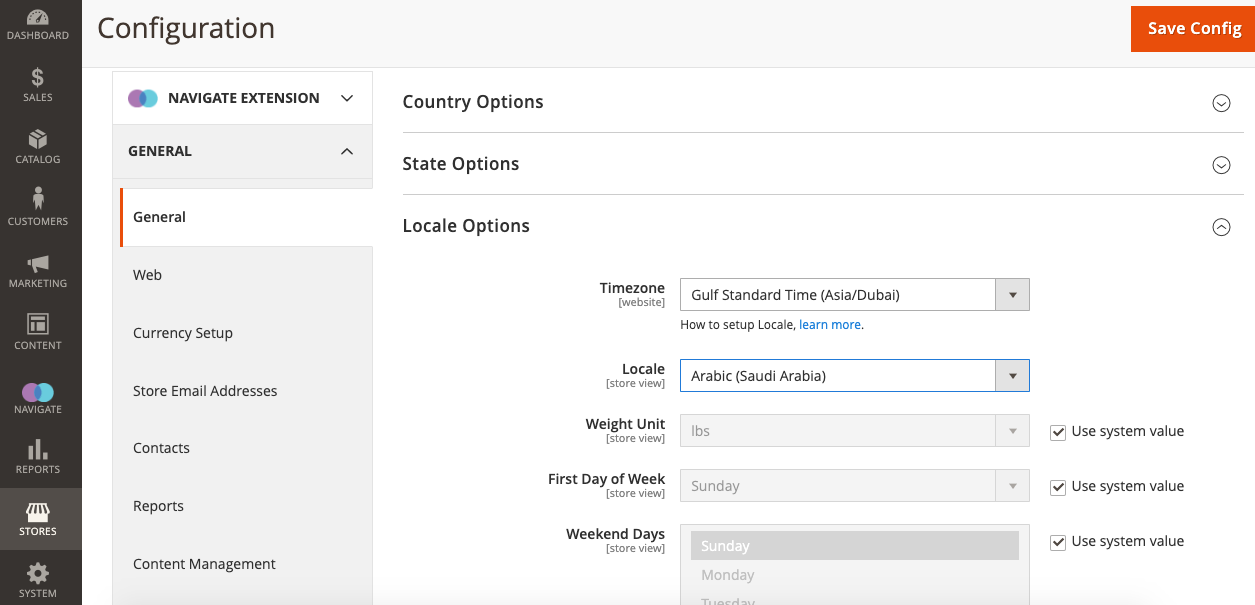
Now we need to configure the store view. To do so, follow the Store tab and select the Configuration option. You can switch between the store views using the corresponding menu at the top of the page. Please choose the store you need to localize and then expand the Locale Options and amend it; click Save for configuration completion.
Simply, you can add a localized version of your mail store. Yet, it would help if you customize it to automatically switch the customers to a specific store view based on their location. Else, customers have to change the store view manually.