How to configure Delivery Date and Time extension
The below explanation guides you towards how to configure this Delivery Date and Time extension in the admin and start ripping the benefit of it.
Store Configurations
Navigate to this path to configure the extension as per your requirement –
Store -> Configurations -> Navigate Extension -> Delivery Date and Time -> General Configurations
General Configurations
- Enable: Select Yes/No from the dropdown to enable/disable this module.
- Enable For Admin: Select Yes/No from the dropdown to enable/disable this module to make it work in the backend.
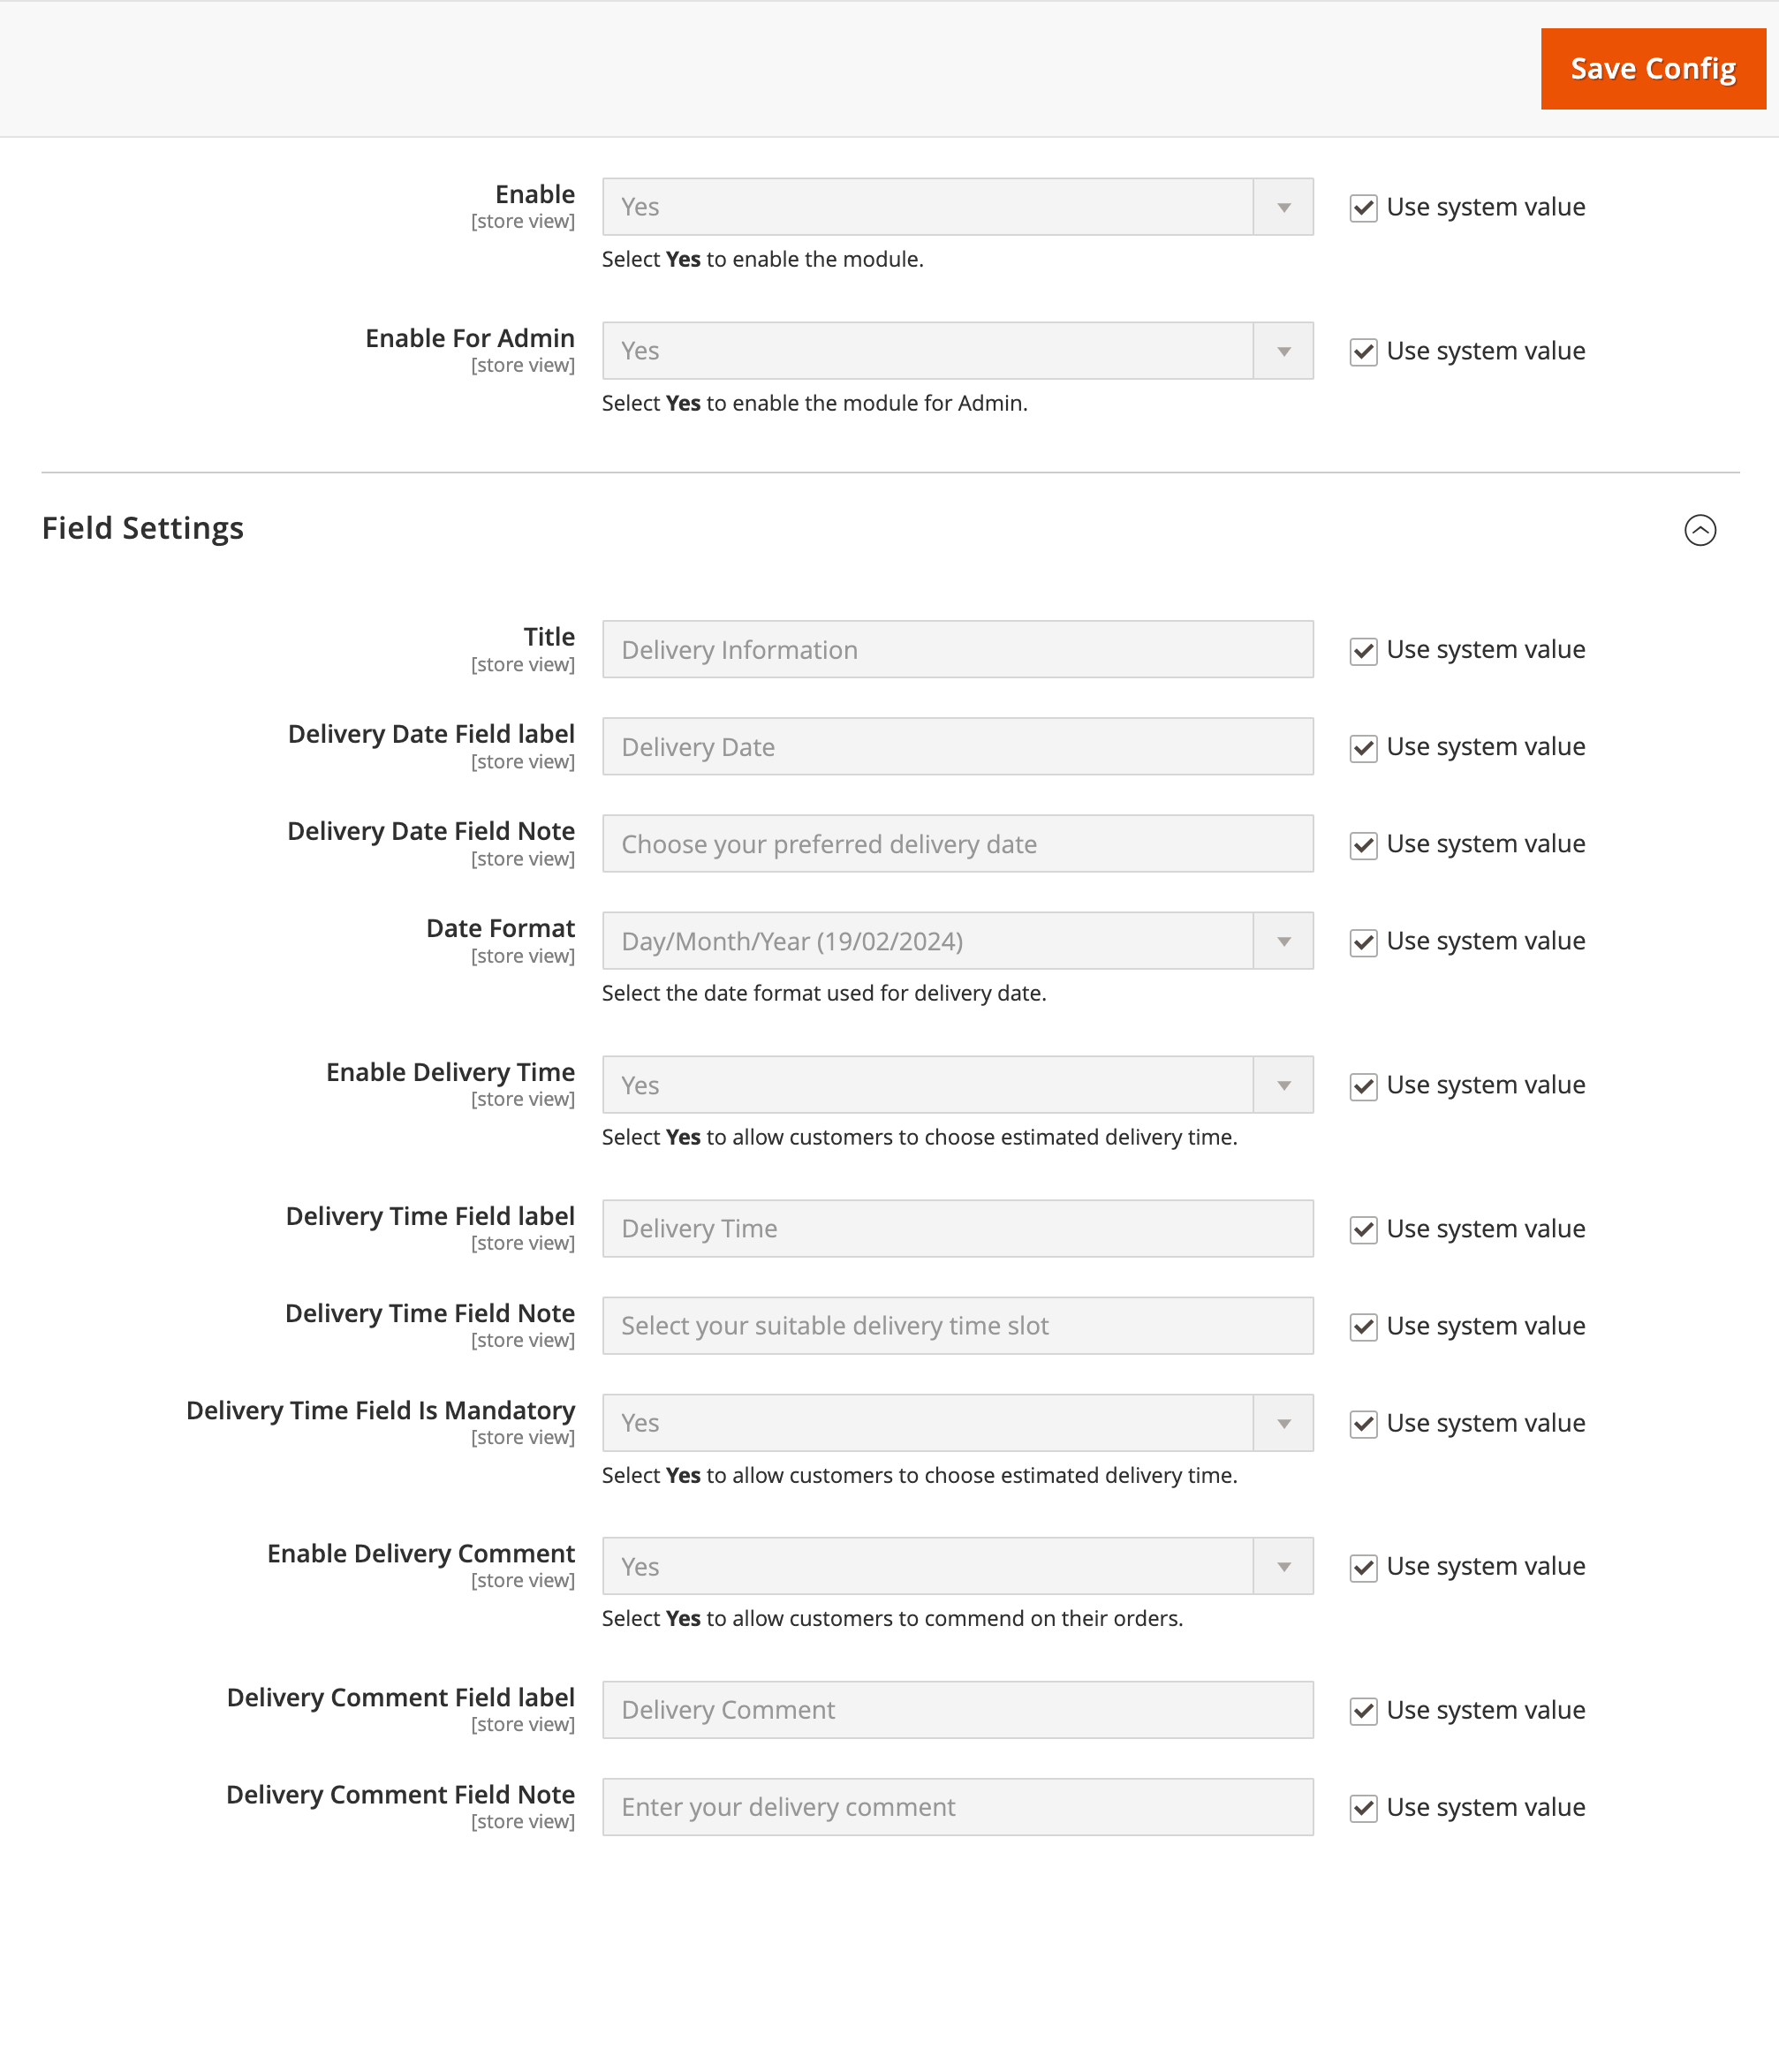
Field Settings
- Title: Enter your preferred Delivery title to show it on the checkout page.
- Delivery Date Field label: Enter your preferred Delivery date label.
- Delivery Date Field Note: Enter your preferred Delivery date note.
- Date Format: Choose your preferred date format from the dropdown.
- Enable Delivery Time: Enable/Disable the delivery time facility on the checkout page.
- Delivery Time Field label: Enter your preferred Delivery time label.
- Delivery Time Field Note: Enter your preferred Delivery time note.
- Delivery Time Field Is Mandatory: Select Yes/No to make the delivery time field mandatory.
- Enable Delivery Comment: Enable/Disable the delivery comment facility on the checkout page.
- Delivery Comment Field label: Enter your preferred Delivery comment label.
- Delivery Comment Field Note: Enter your preferred Delivery comment note.
Delivery Management
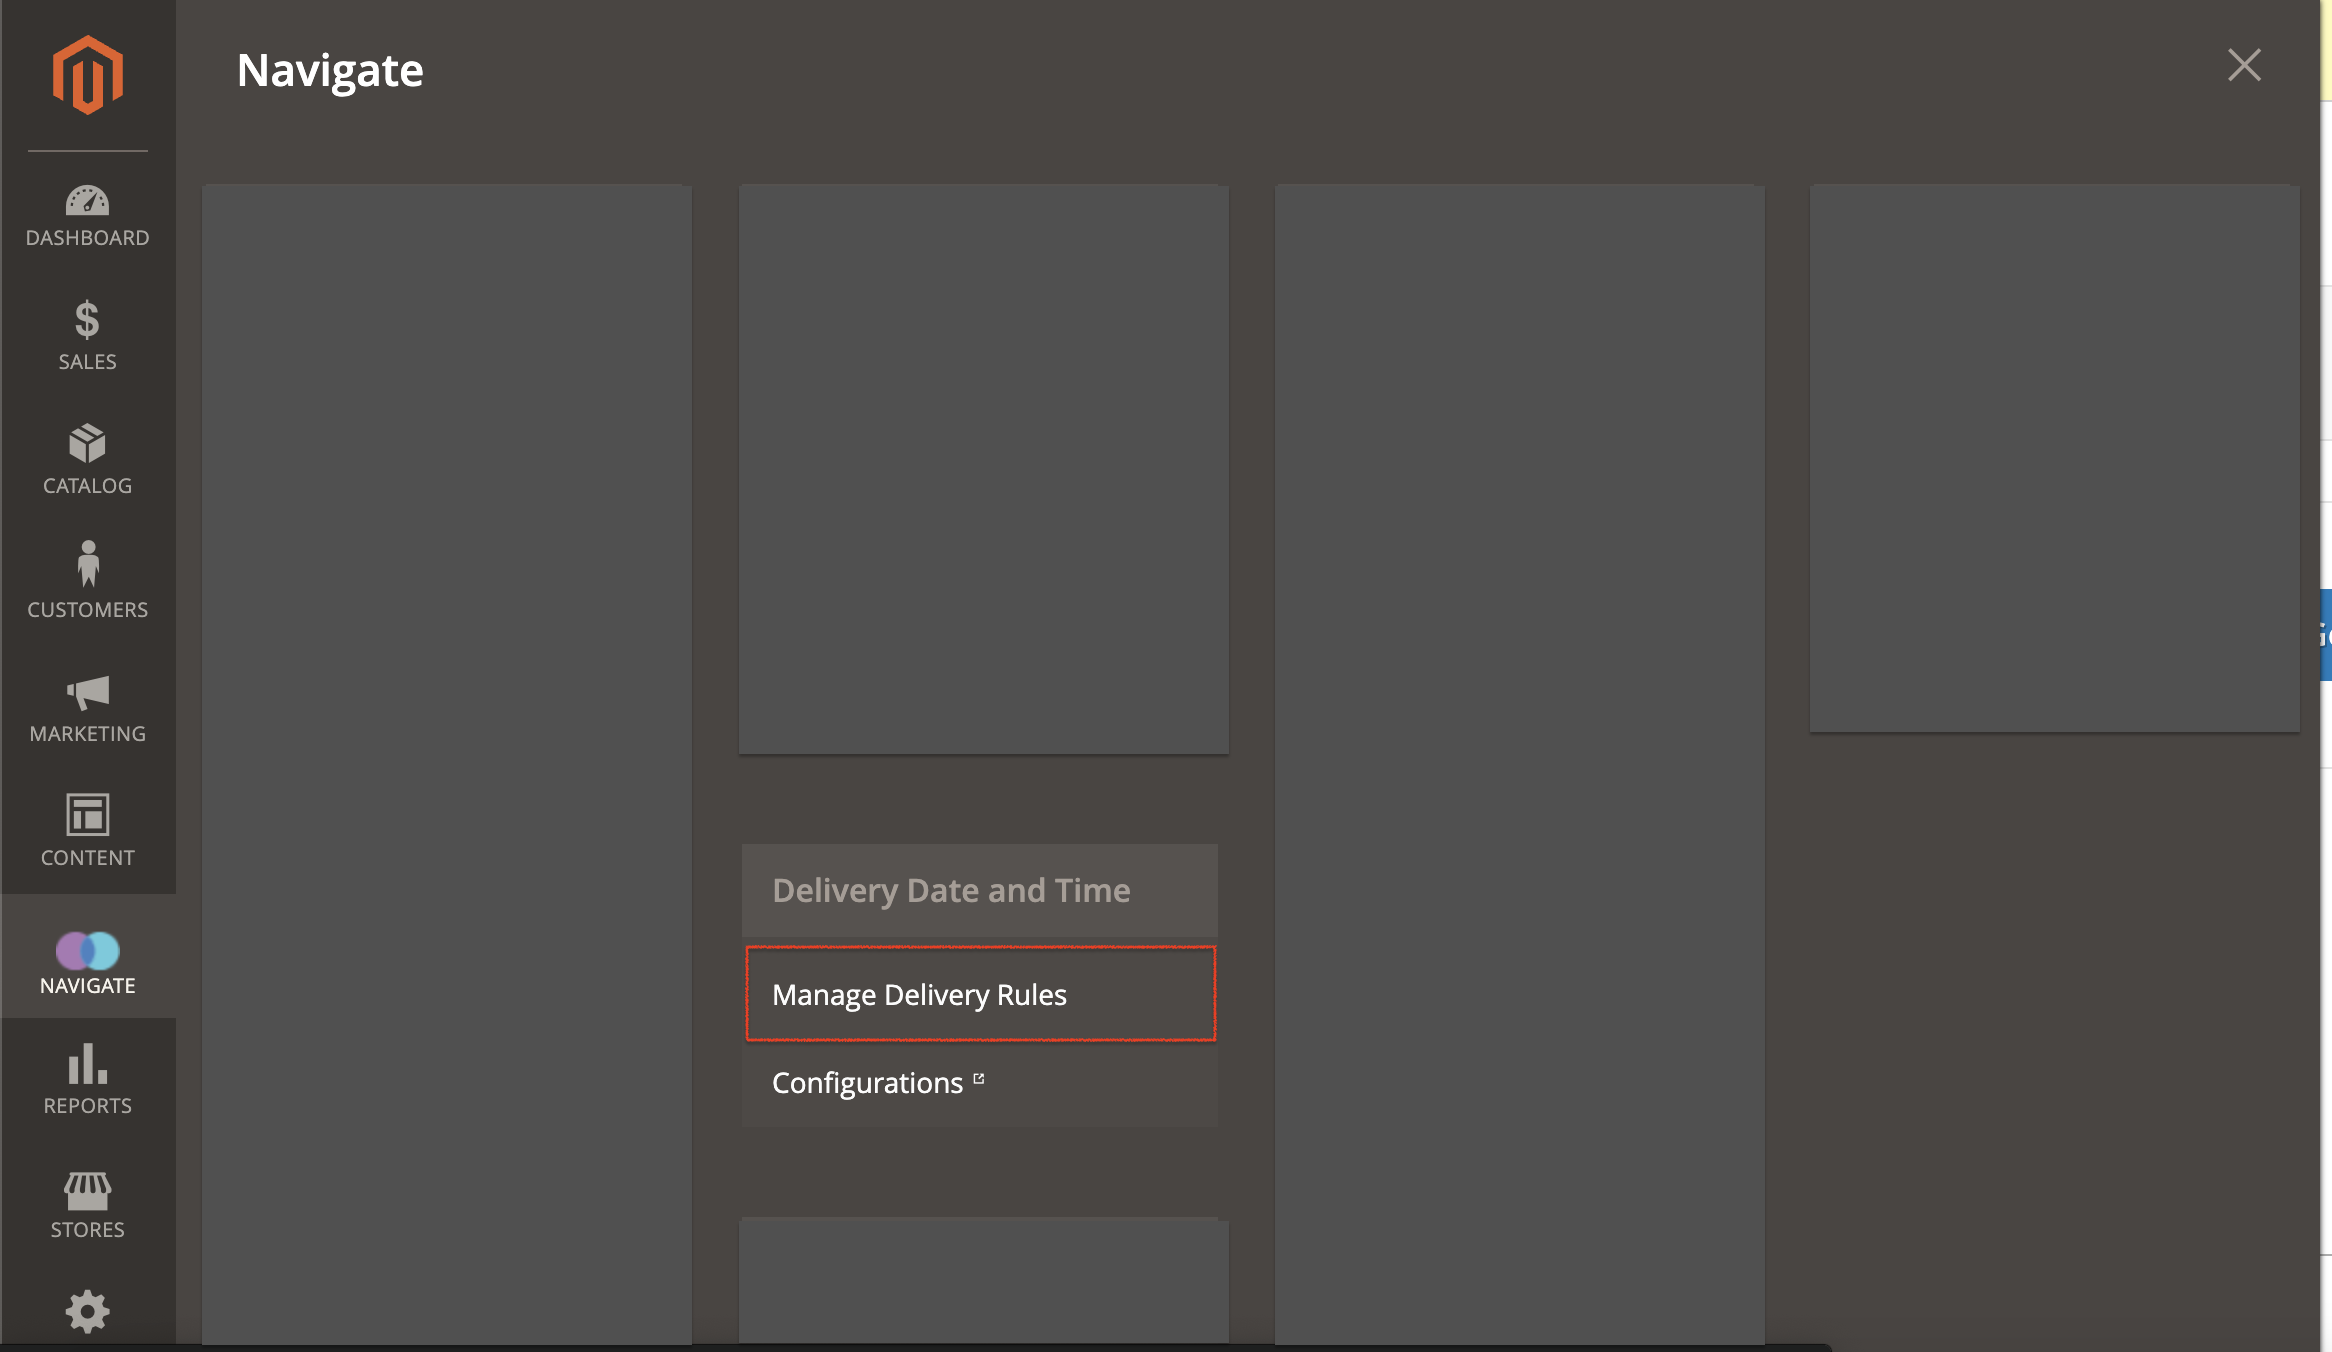
To add or edit delivery rules, navigate to Navigate → Manage Delivery Date Rules and manage them as per your requirement.
After landing on the Delivery management page, you will see a standard grid page with all native grid options, such as filters, mass actions, pagination, column management, etc.
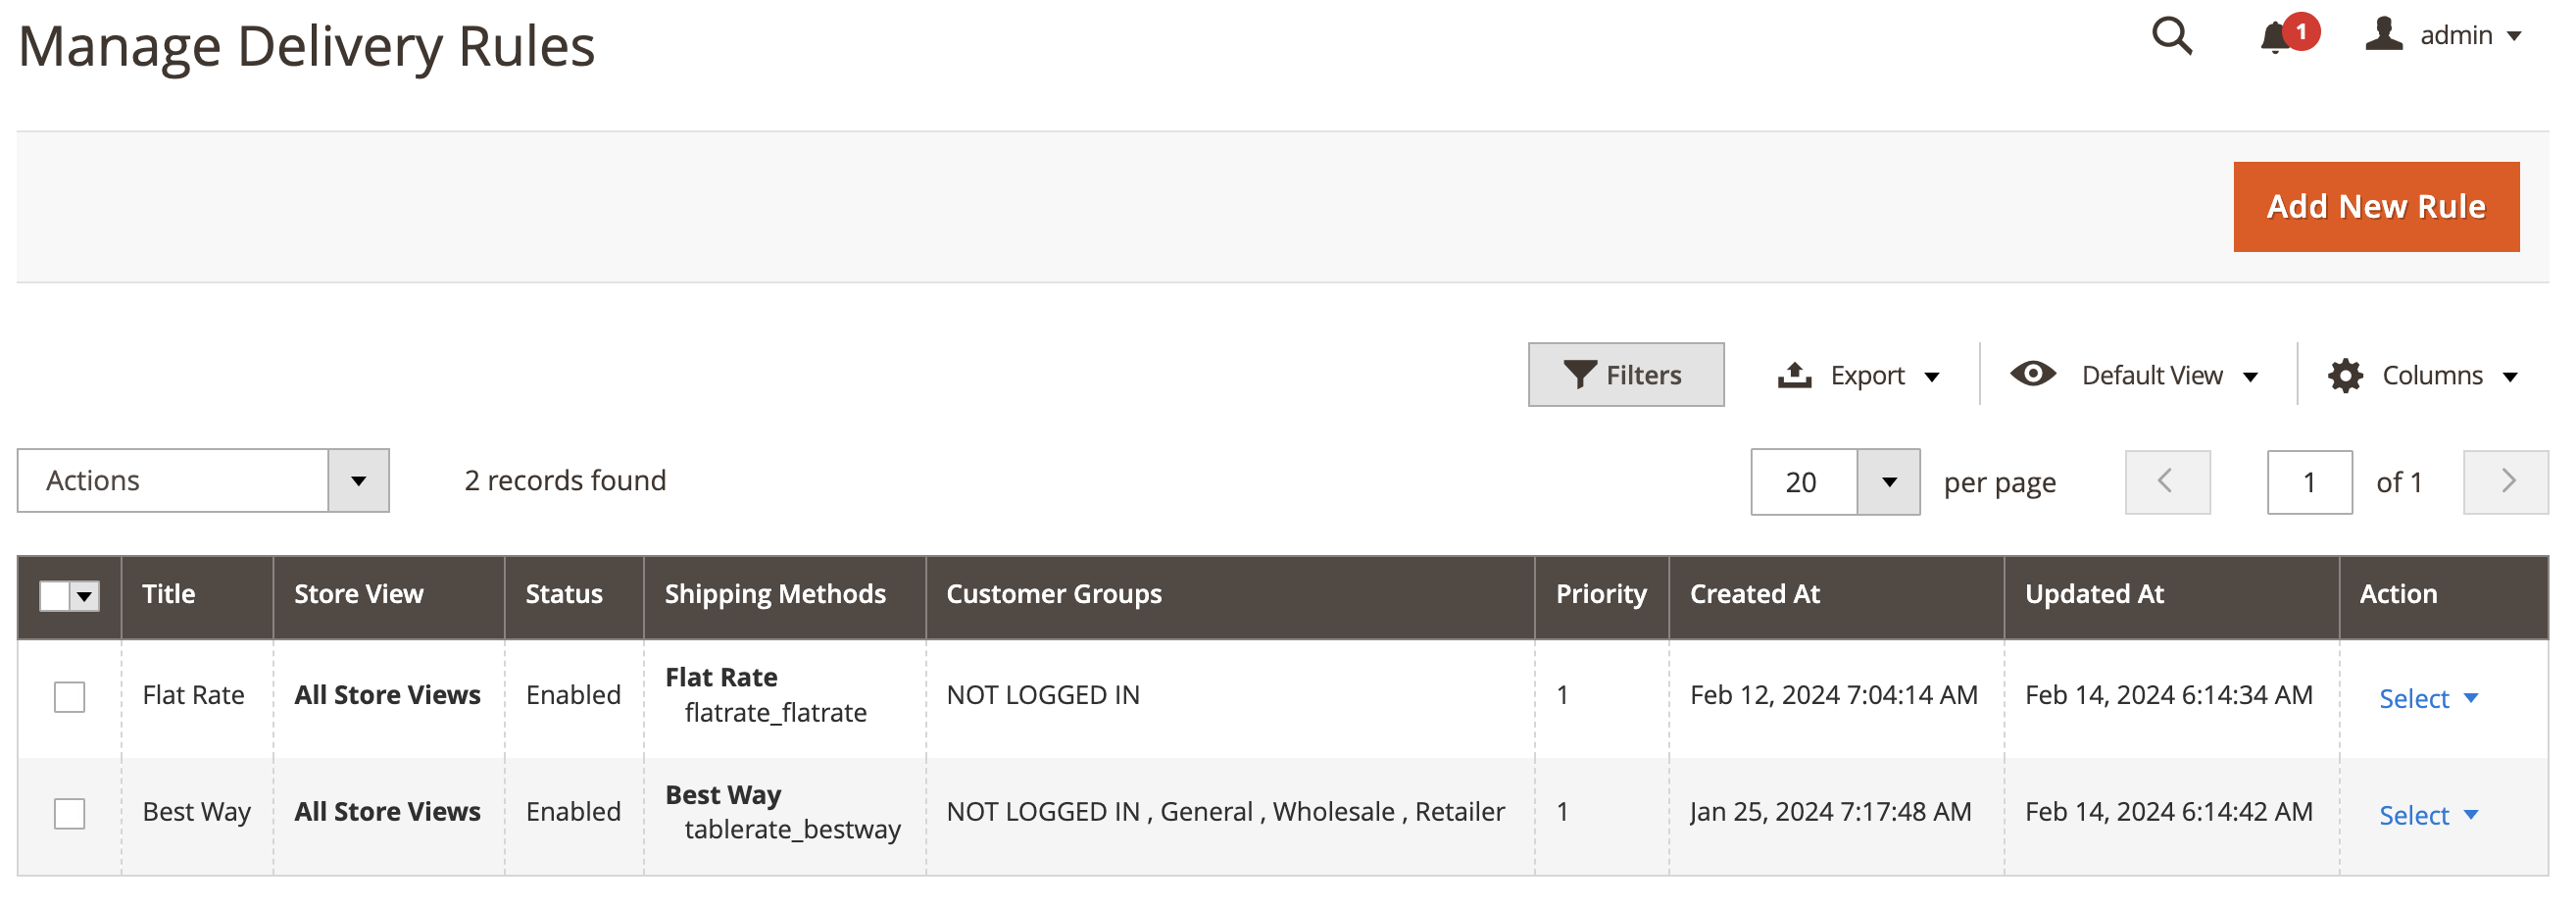
Click the "Add New Rules" button above the grid to create a new rule, which will take you to the edit page. On the Edit page, you will see a few sections. Each section has several options that need to be filled up with your preferred requirement. Let's discuss these sections and their options in details below -
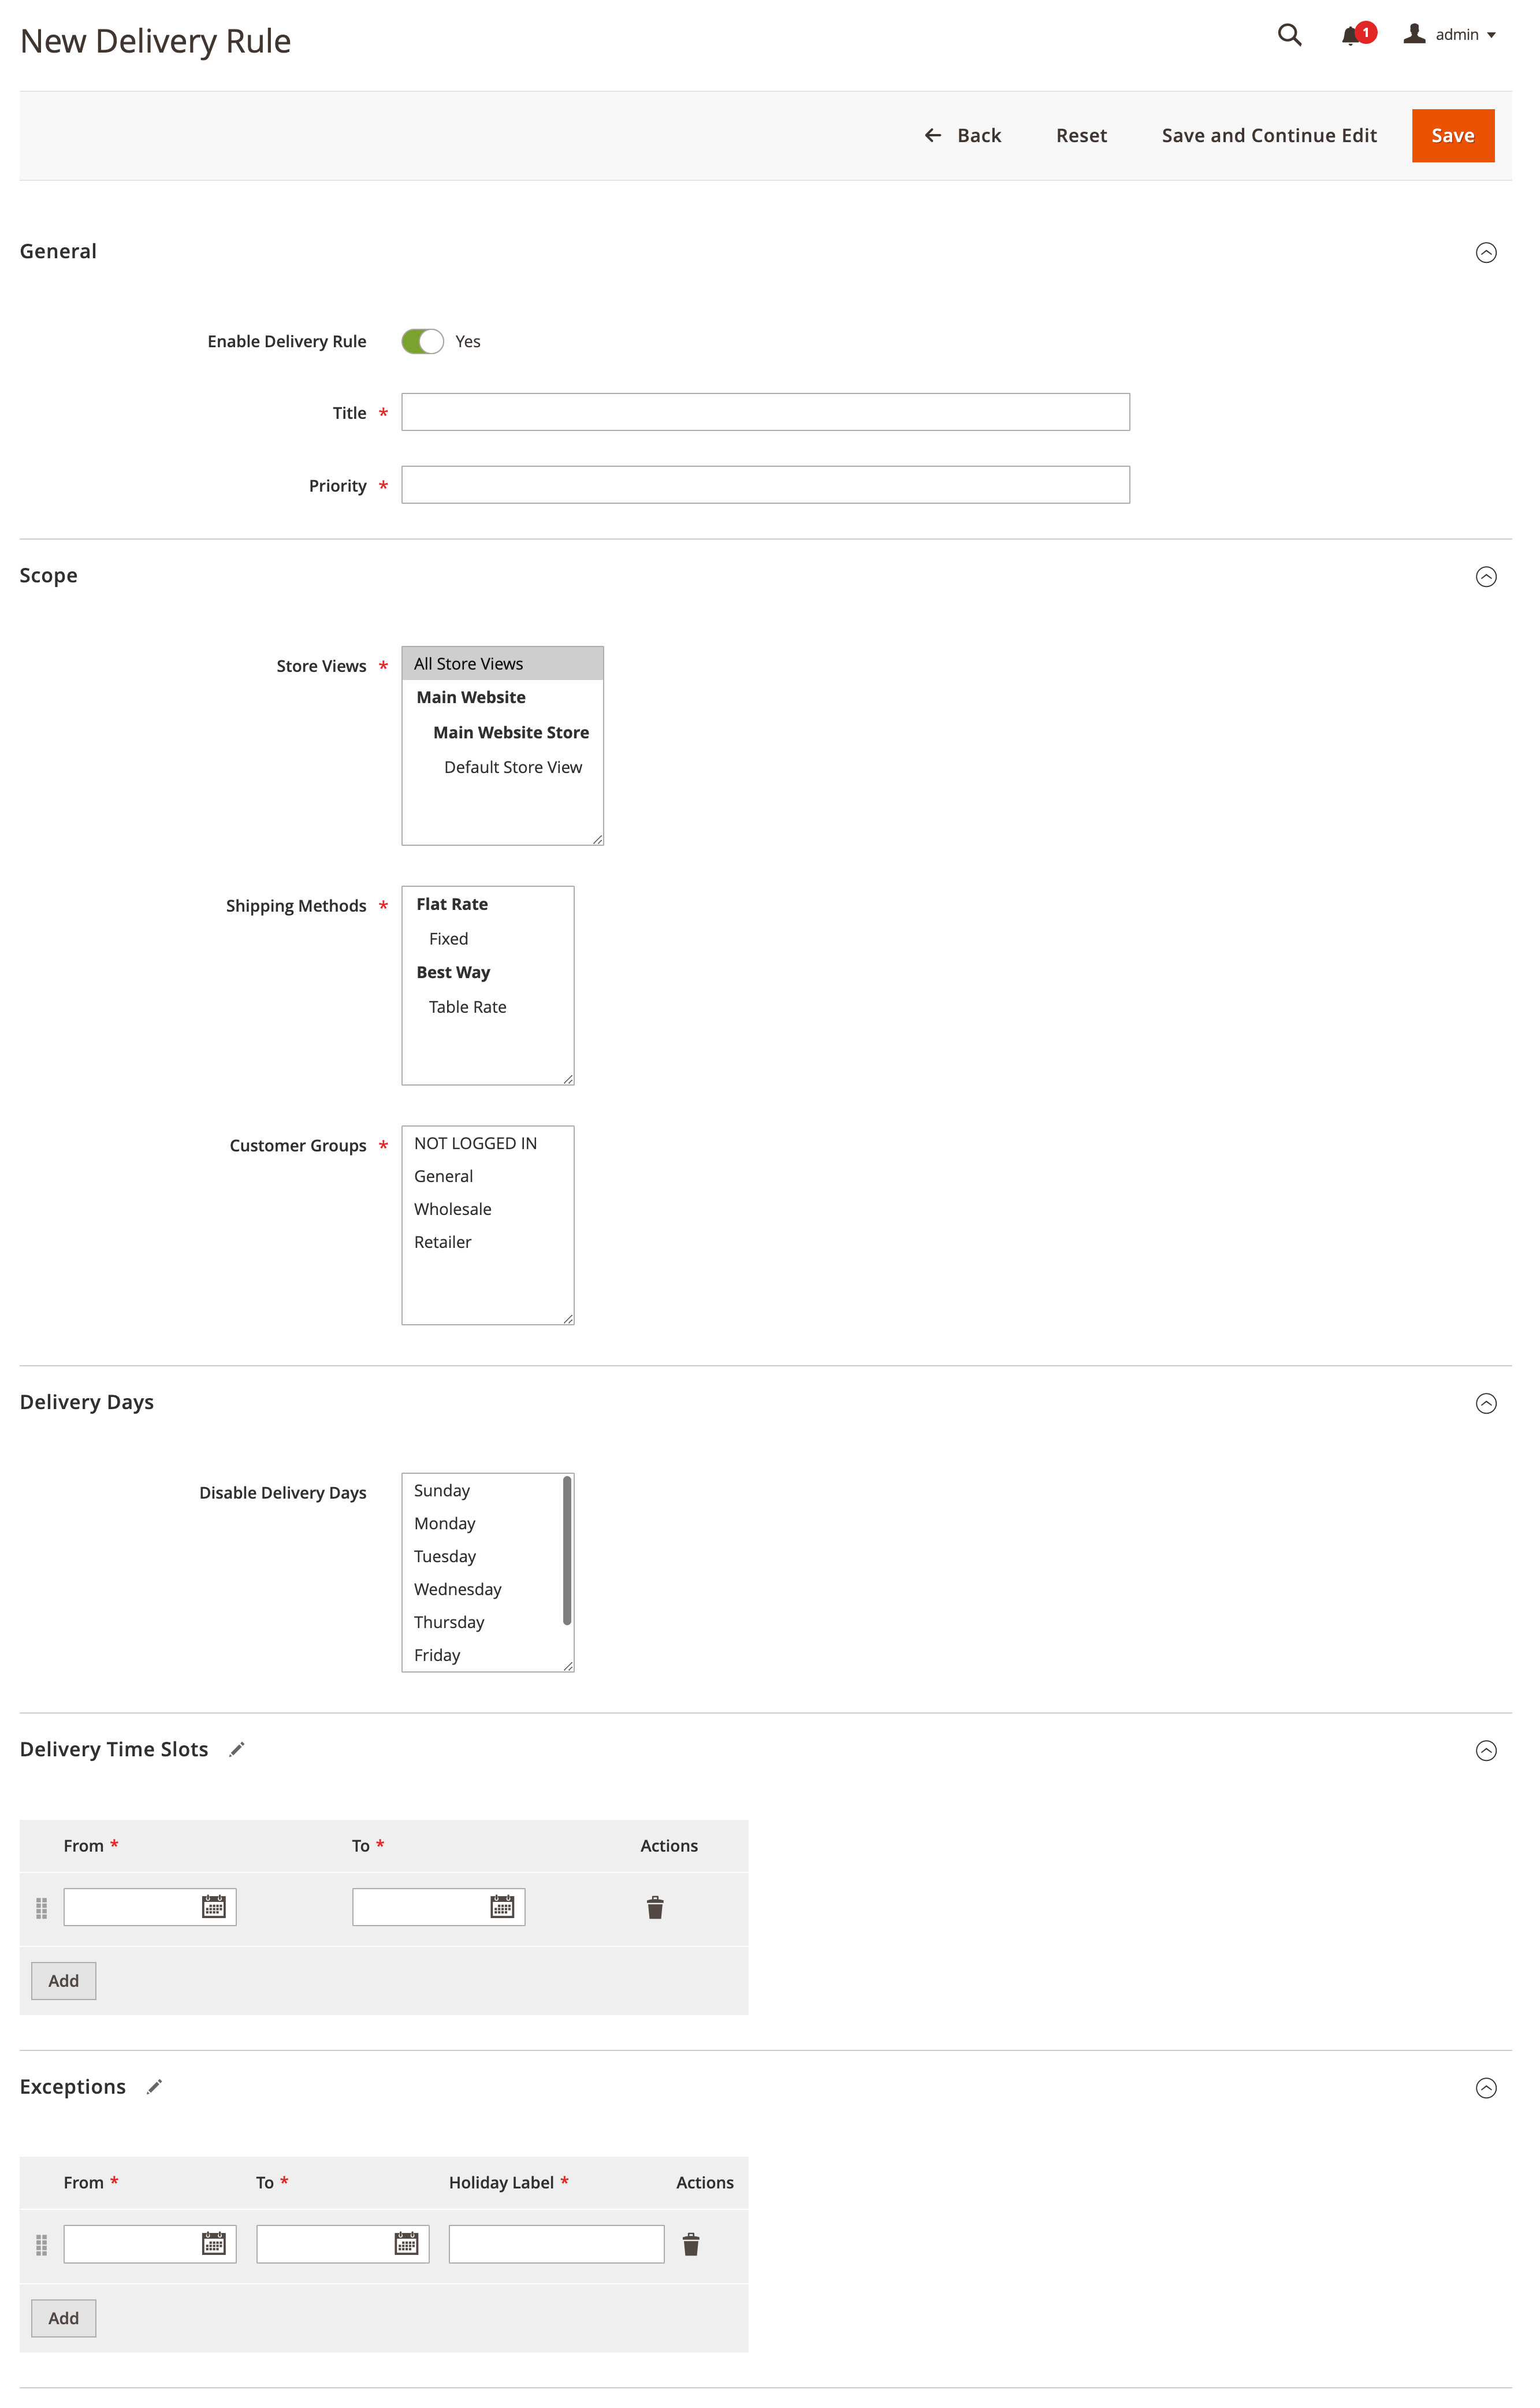
General
- Enable Delivery Rule: Enable/Disable the rule.
- Title: Enter the rule title.
- Priority: Enter the priority value in the numeric format for the rule.
Scope
- Store View: Select the Store View option(s) from the list.
- Shipping Methods: Select the shipping method(s) from the list.
- Customer Group: Select the customer group(s) from the list.
Delivery Days
- Disable Delivery Days: Choose the delivery day(s) you don't process the orders. So, the customer is never able to select those days.
Delivery Time Slots
Add your preferred delivery time slots according to your daily order/shipment processing activities. Click the calendar icon and slide the roller displayed on the Hour and Minute options. You can add multiple slots by clicking on the Add button.
Exceptions
Add the list of holidays to prevent the users from selecting the date you don't process the orders.
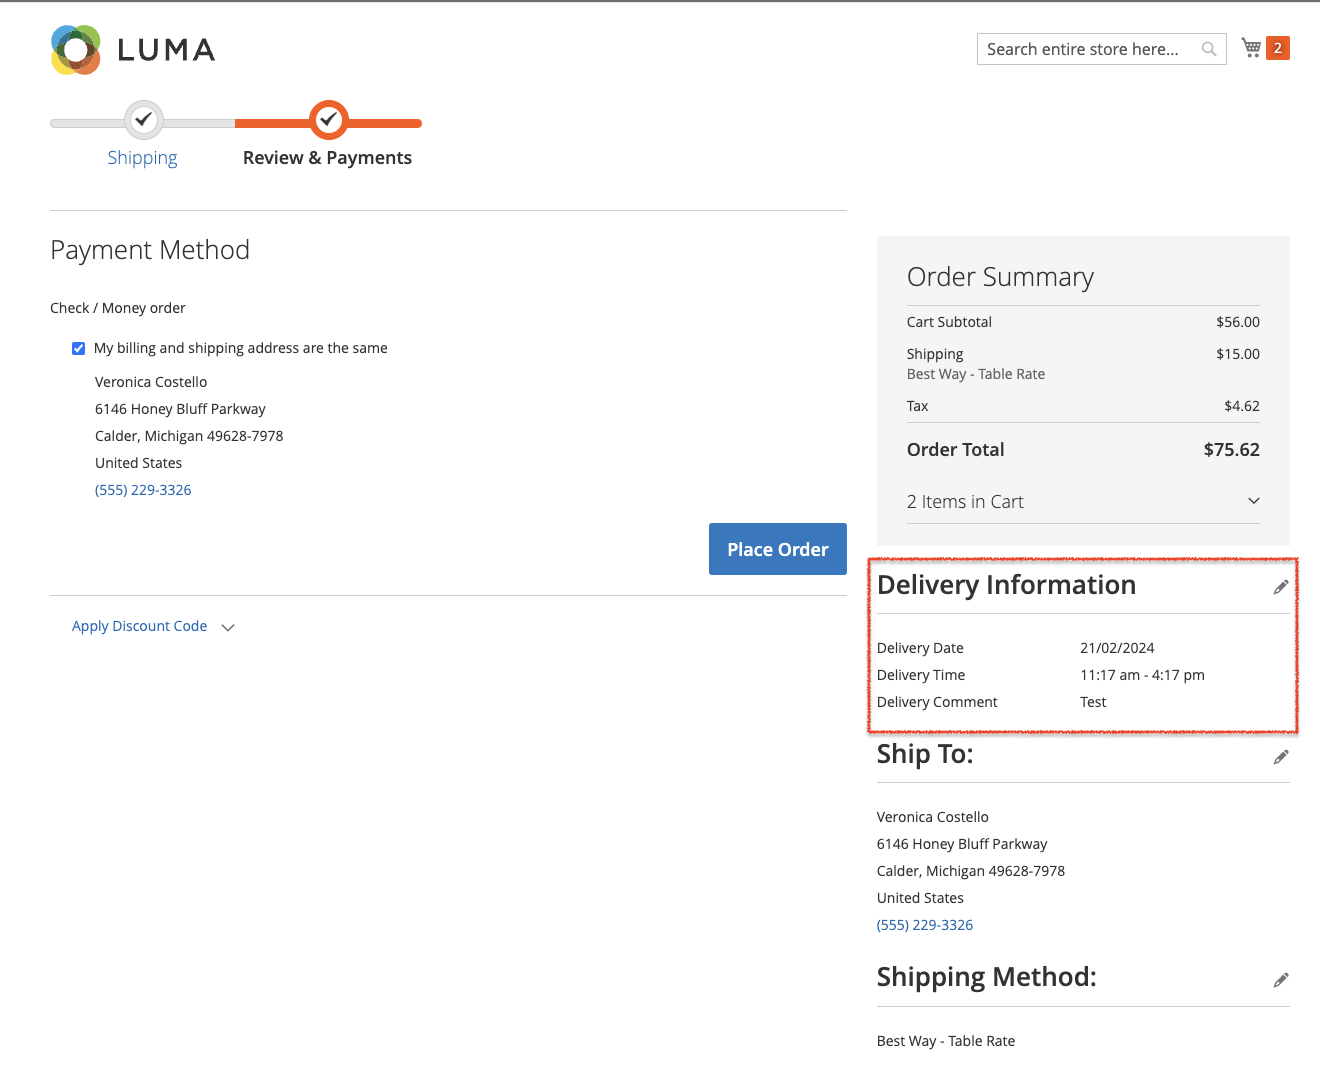
Stroefront
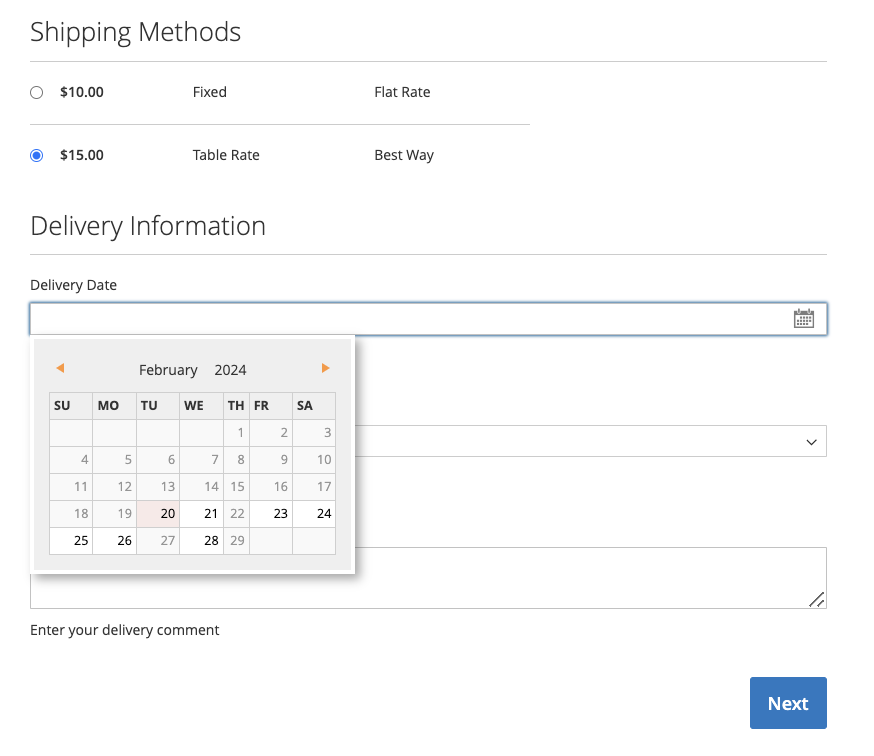
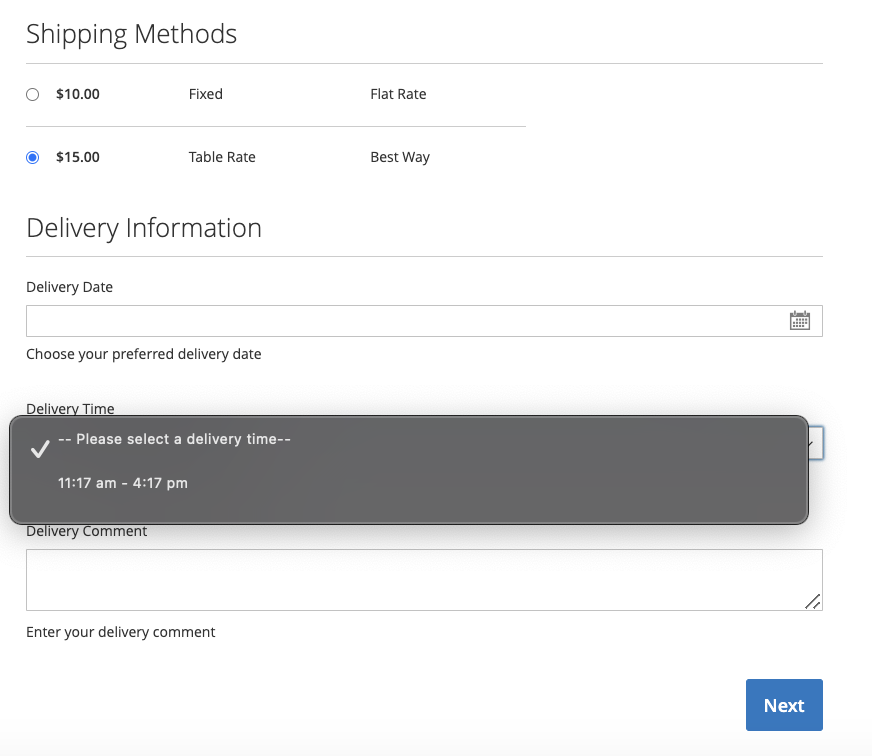
Review the below images to see how the delivery rule looks on the checkout page.
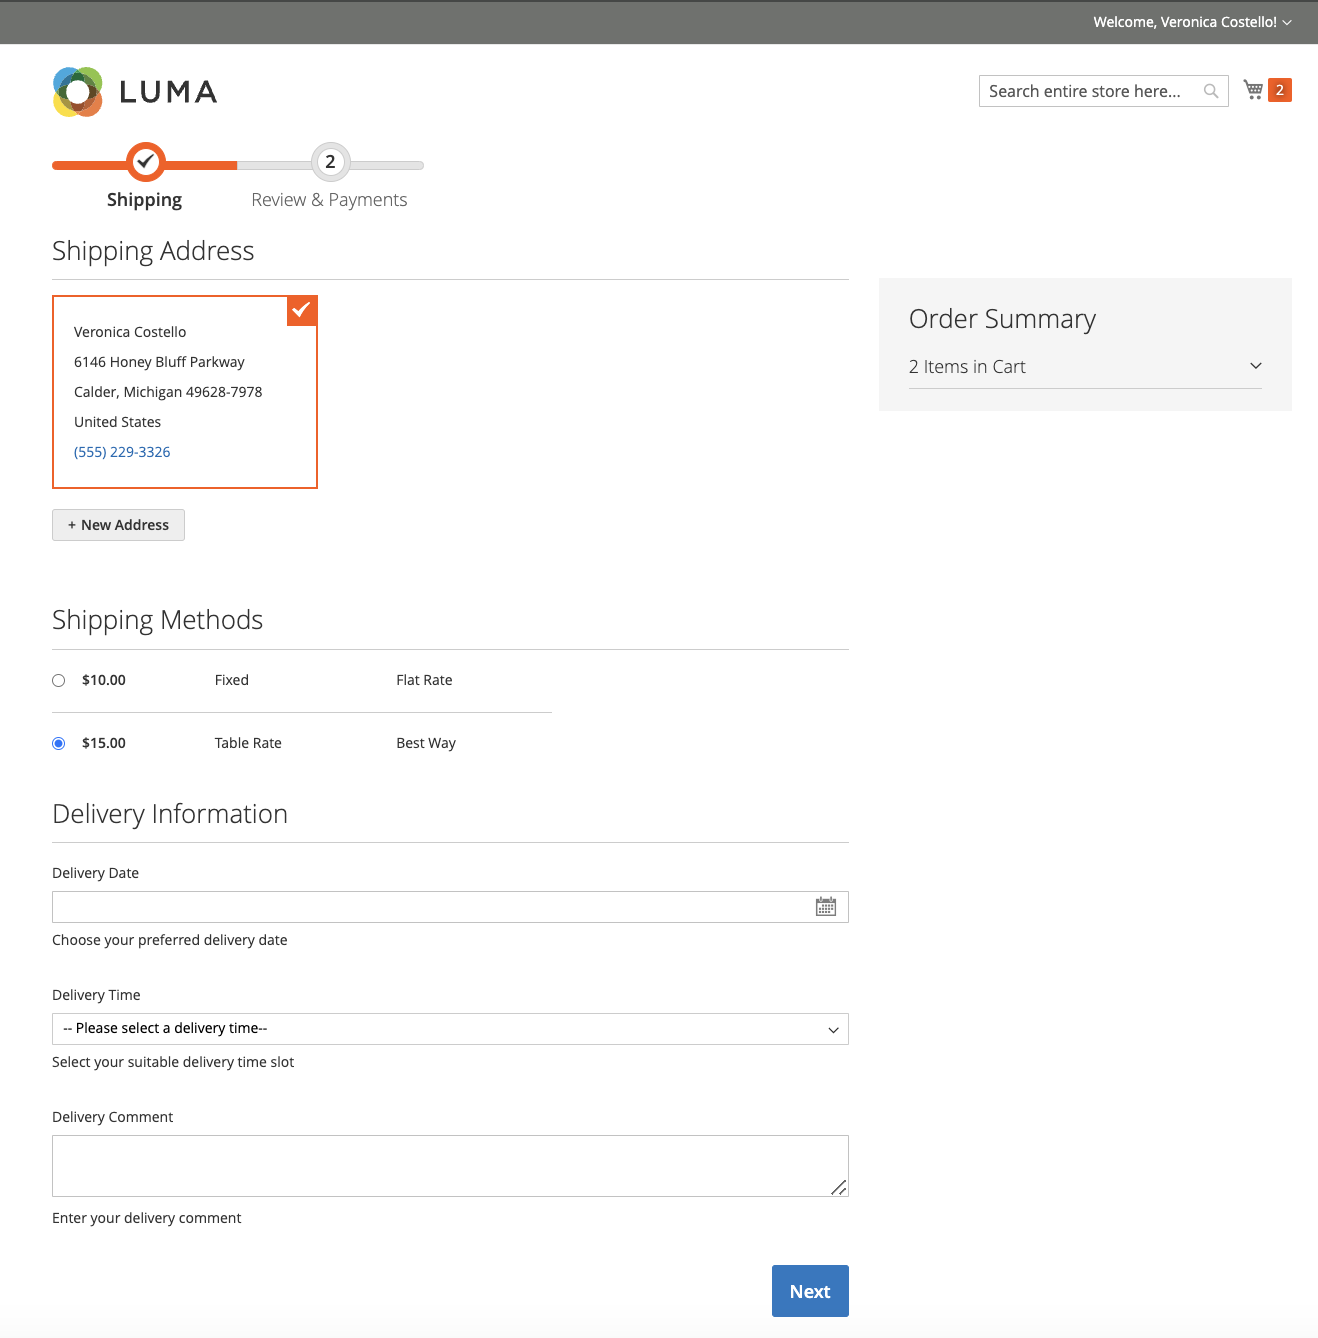
Delivery Date selection
Delivery Time selection
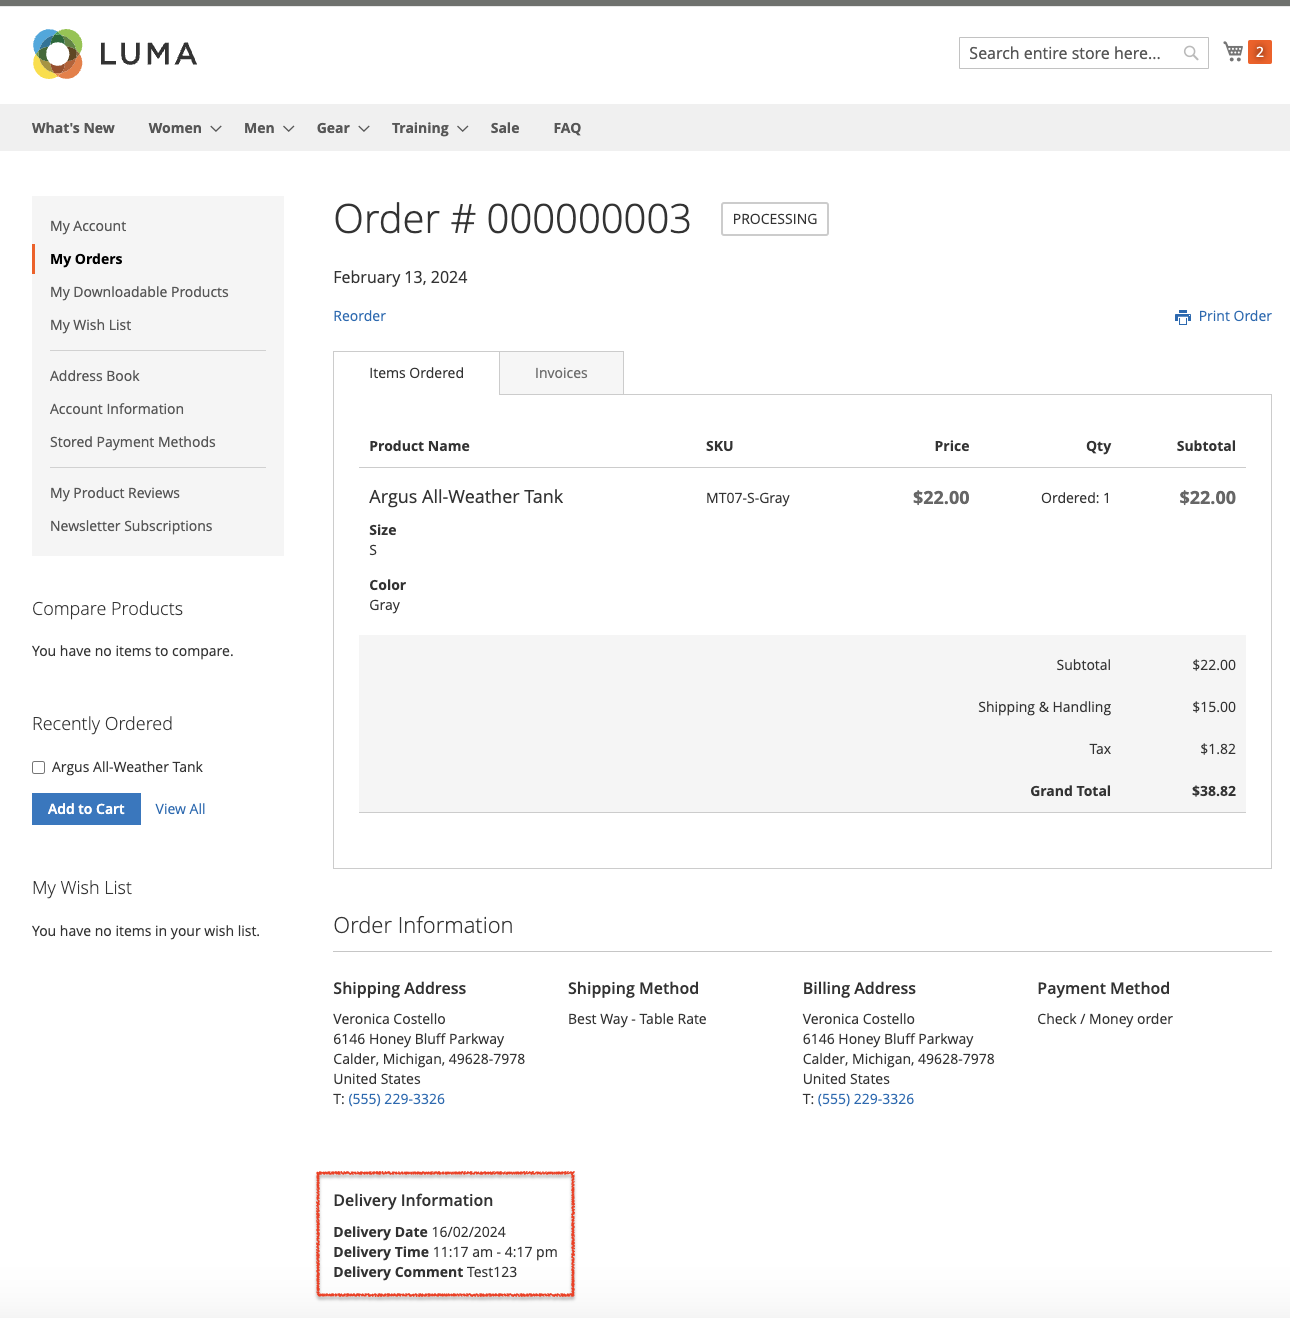
Delivery Info on the payment step
Delivery Info on the customer dashboard