How to configure Quickview extension
The below explanation guides you towards how to configure this Quickview extension in the admin and start ripping the benefit of it by showing it on the storefront.
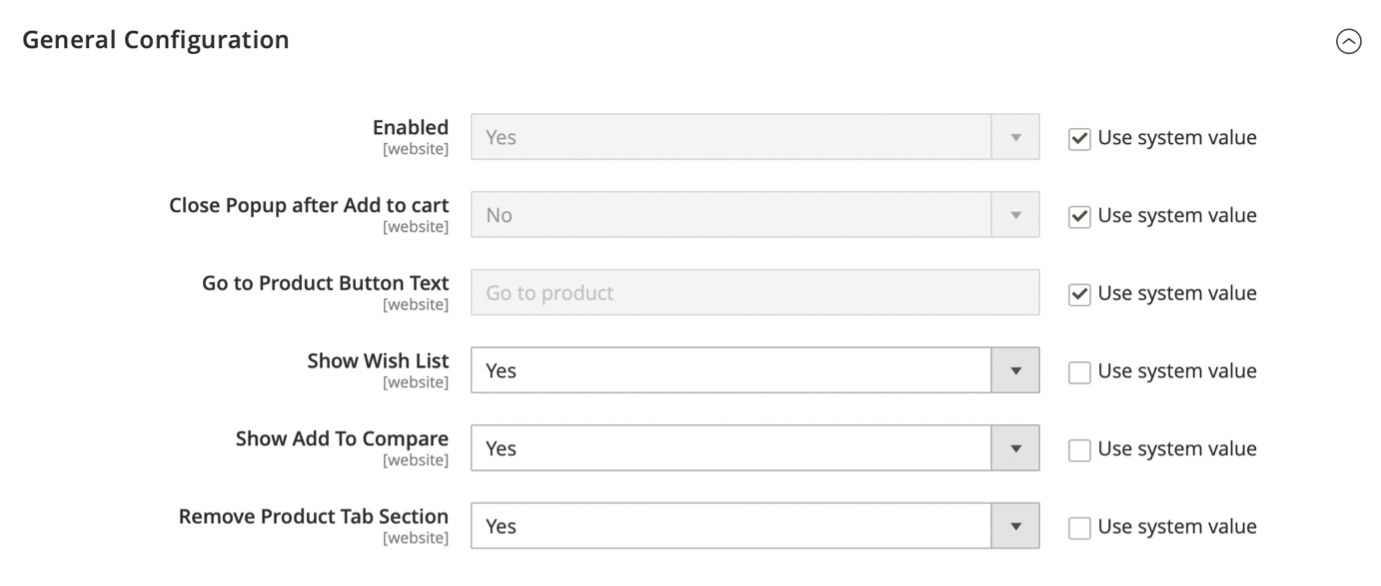
Store Configurations
Navigate to this path to configure the extension as per your requirement –
Store -> Configurations -> Navigate Extension -> Quick View -> General Configuration
General Settings
- Enabled: Select Yes/No from the dropdown to enable/disable this module.
- Yes: Choosing this option will enable the module.
- No: Selecting this option will disable the module.
- Close Popup After Add To Cart: Select Yes/No if you want the quickview popup to be closed after adding the product into the cart.
- Go To Product Button Text: This field will allow you to change the default text of the button shown in the quickview popup. The purpose of this button is to take the user to the product detail page.
- Show Wish List: Allows to show/hide the “Add to Wish list” feature in the quickview popup.
- Show Add To Compare: Allows to show/hide the “Add To Compare” feature in the quickview popup.
- Remove Product Tab Section: Allows to show/hide the multiple tabs shown below the product gallery in the quickview popup.
Don’t forget to hit the save button after configuring any of the above settings and perform the Cache Management.
Storefront
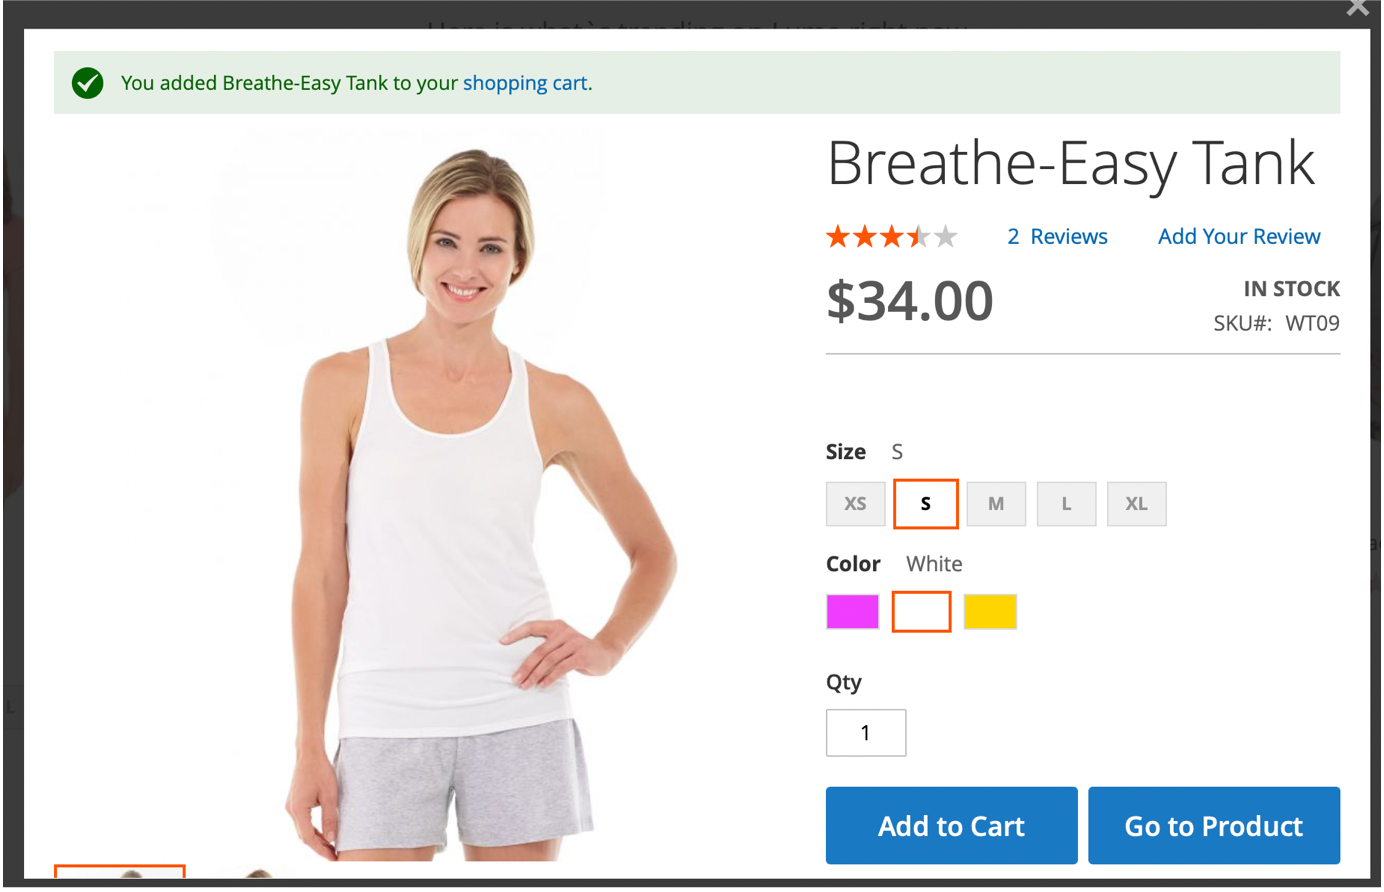
- After performing the above steps, you can see this Quickview icon on each product block when you hover on it.
![]()
- Clicking on that icon will open a popup showing product detail page information and will allow you to add the product into the cart.
Last update: 2022-05-17