How to configure Announcement Bar extension
The below explanation is about helping you understand the purpose of each configuration and configure them as per your business requirement.
Store Configurations
Navigate to the General Settings page following the below path:
Store → Configurations → Navigate Extension → Announcement Bar → General Settings
General Settings
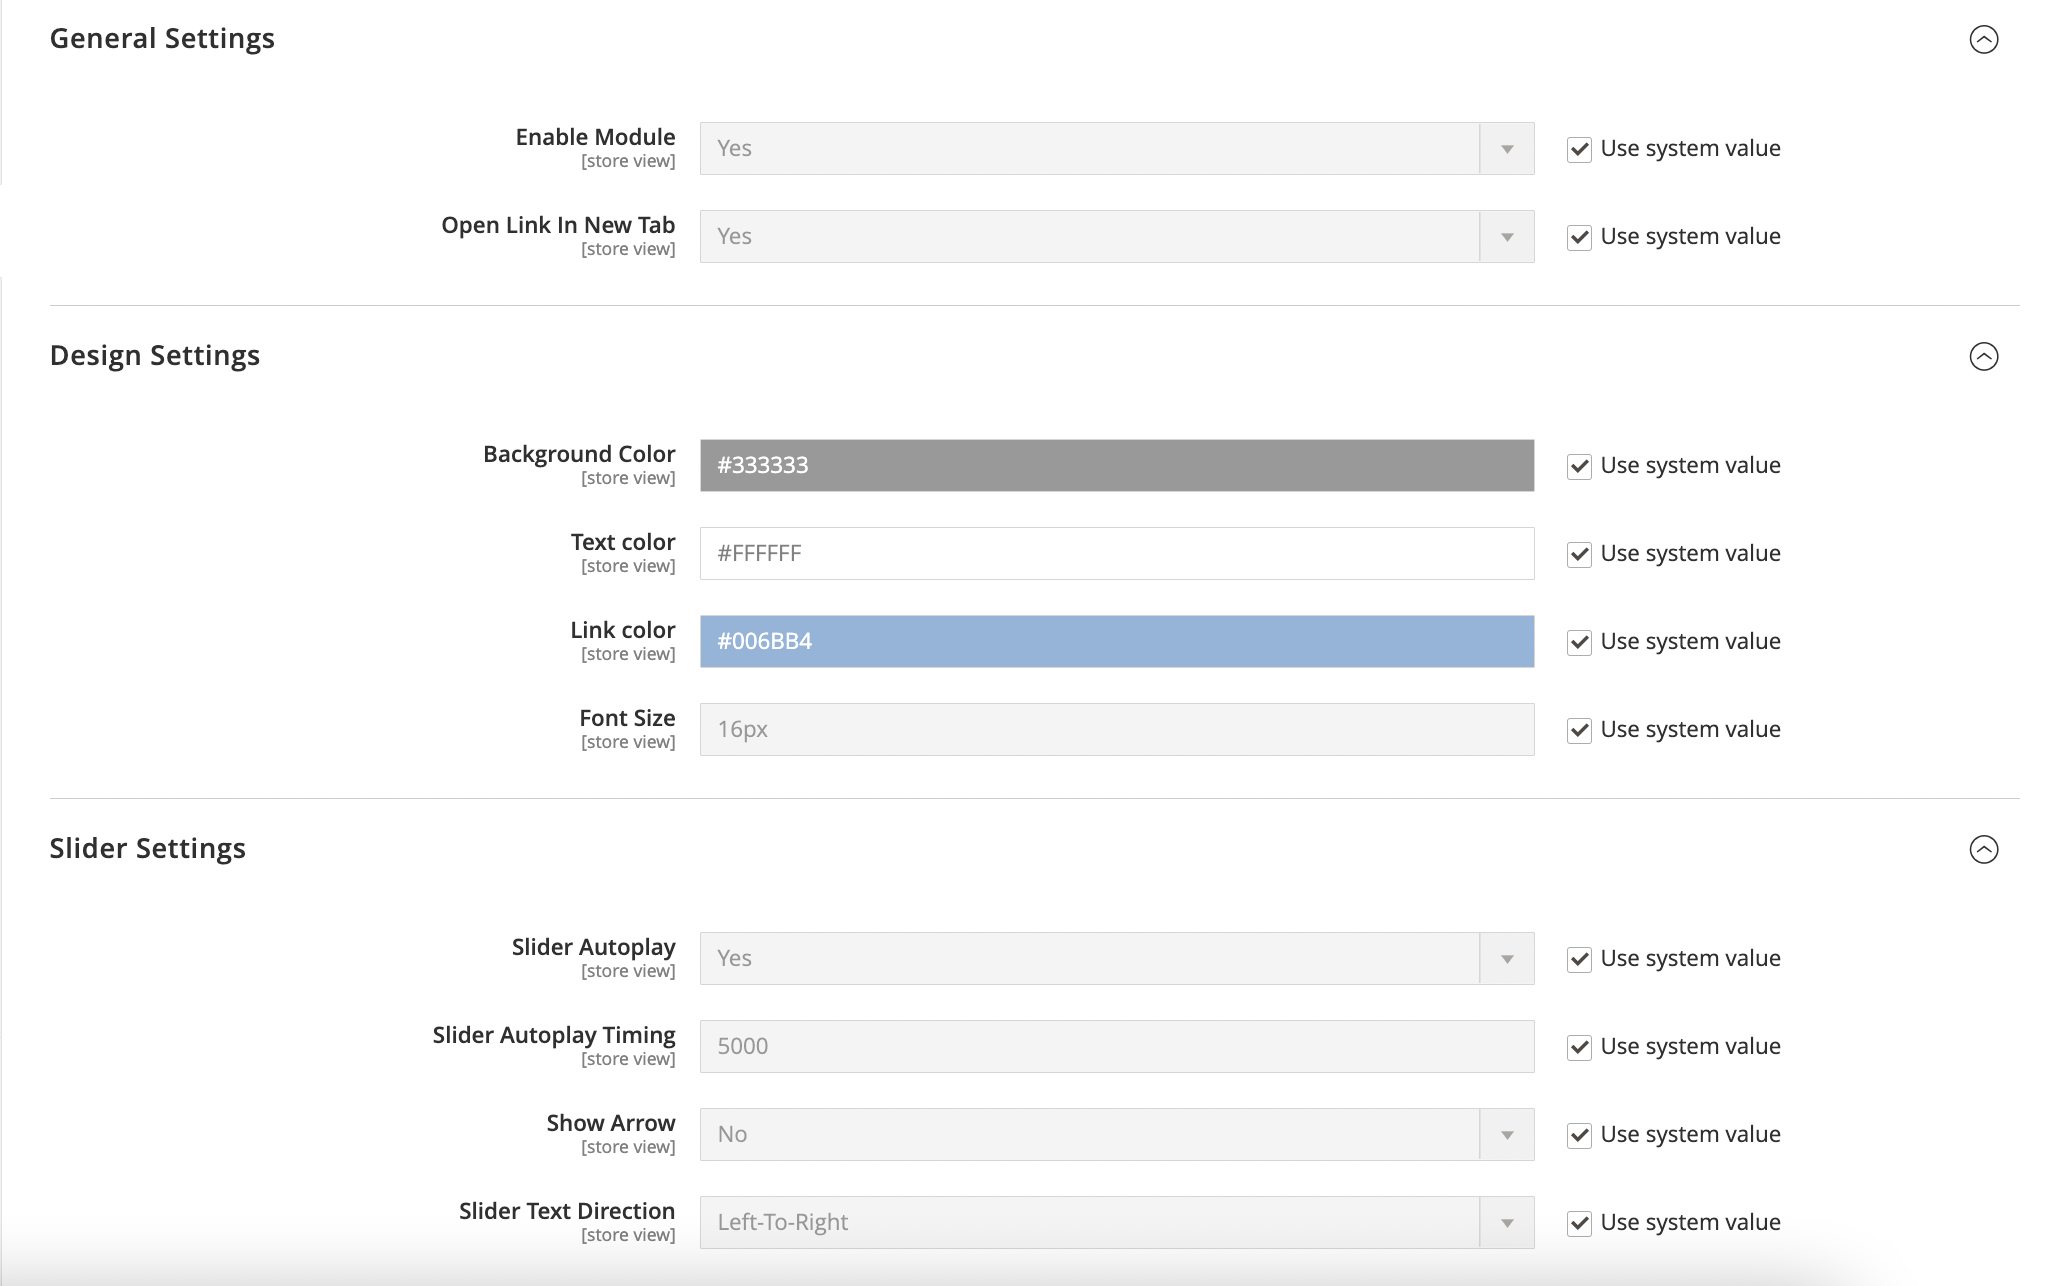
- Enable Module: Select the Yes/No option from the dropdown to enable/disable the module.
The default value is Yes.
- Open Link In New Tab: Choose Yes to open the link in the new tab.
The default value is Yes.
Design Settings
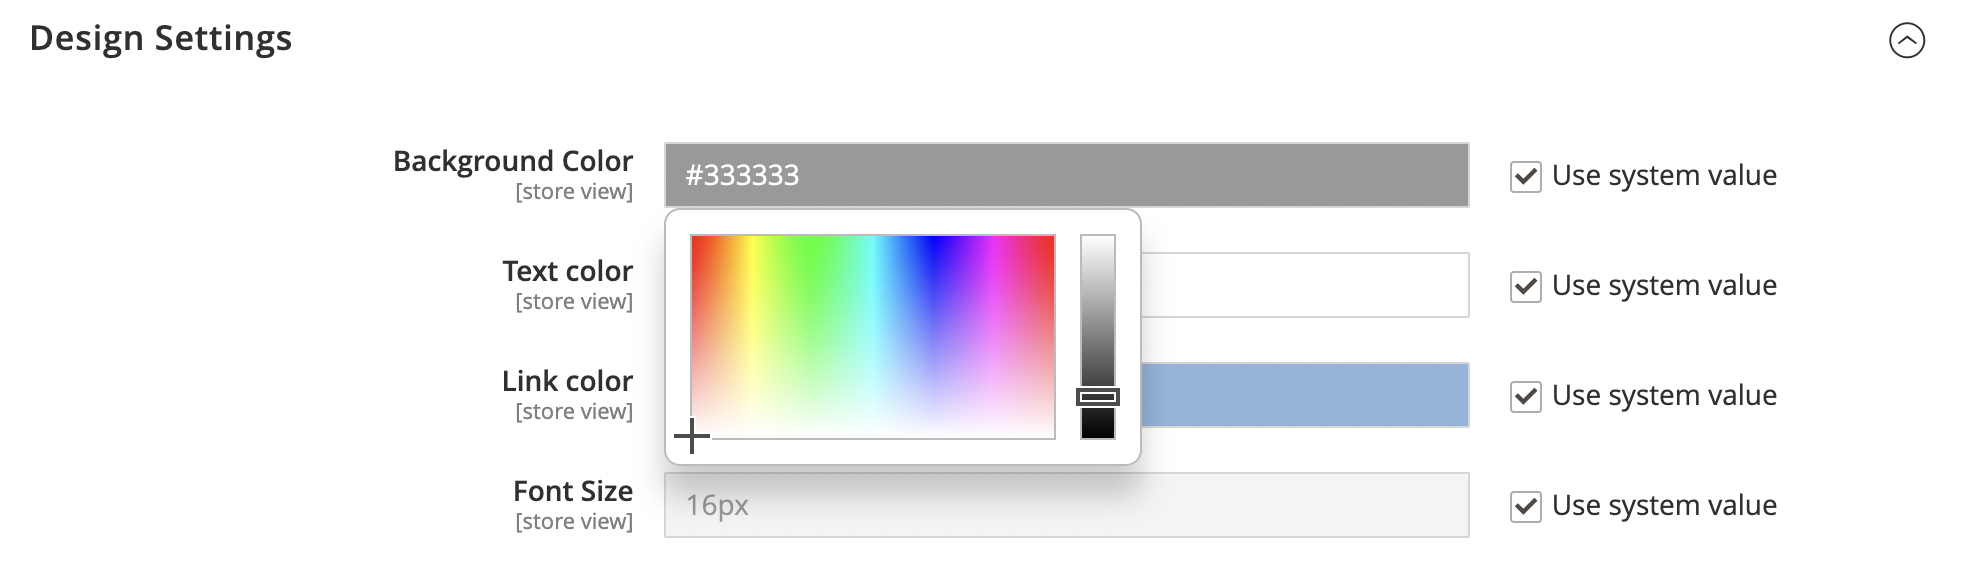
- Background Color: Enter your preferred hexadecimal code in the given textbox or slide up/down the color slider from the color picker box. Applying this color will change the background color of the announcement bar.
The default value is #333333.
- Text Color:: Change the text color by entering the hexadecimal code or sliding up/down the color slider from the color picker box.
The default value is #FFFFFF.
- Link Color: The entered hexadecimal code will change the color of the text-based link added in the announcement bar text.
The default value is #006BB4.
- Font Size: This setting will allow you to set the font size of your announcement text.
The default value is 16px.
Slider Settings
- Slider Autoplay: Choose Yes/No to autoplay the announcement bar slider.
The default value is Yes.
- Slider Autoplay Timing: Set the autoplay slider timing.
The default value is 5000.
- Show Arrow: Select Yes if you want to provide a facility for your users to slide the announcement bars using arrows.
The default value is No.
- Slider Text Direction: Select Left-To-Right or Right-To-Left option to slide the announcement bar text as per your user interface.
The default value is Left-To-Right.
Manage Announcements
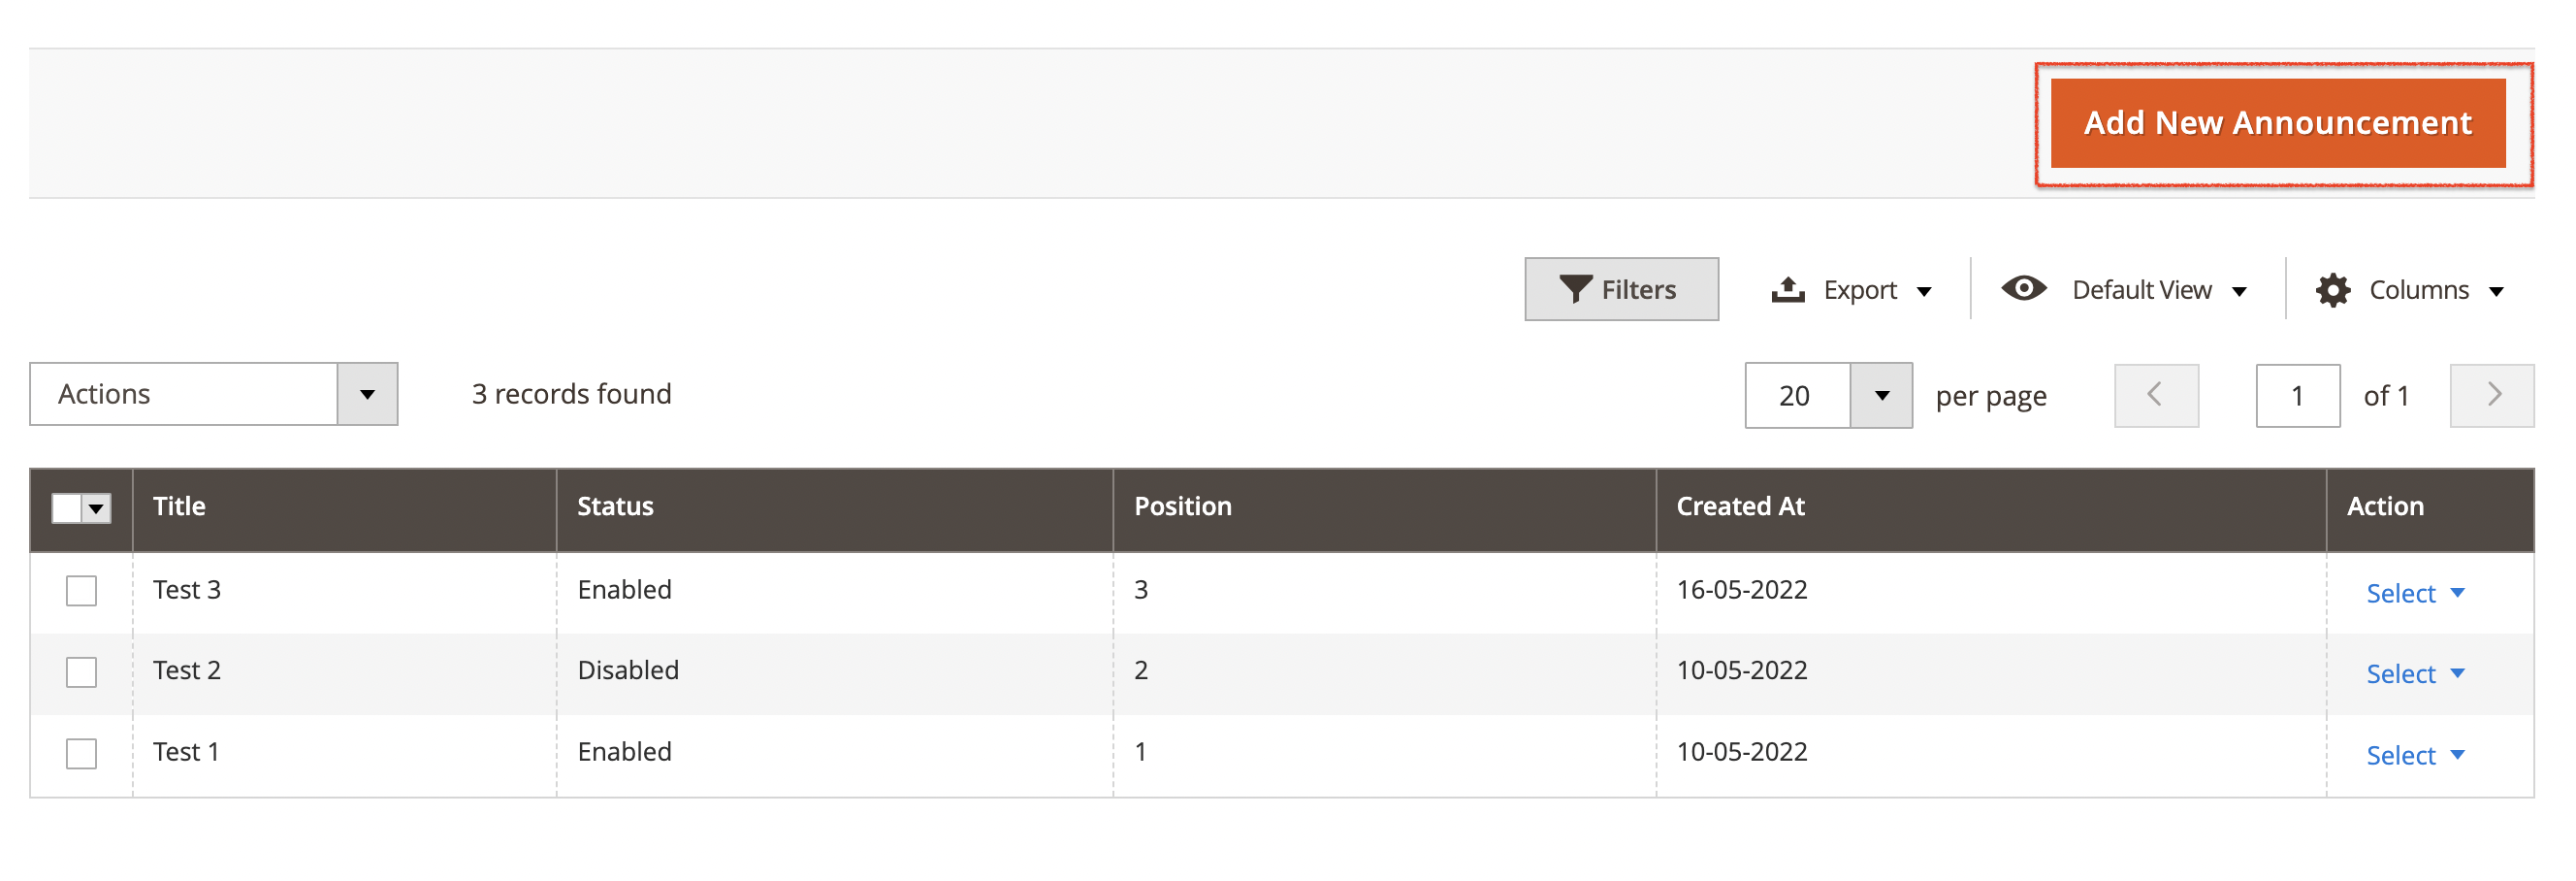
Click on the NAVIGATE menu displayed in the left panel and look for Manage Announcements. Clicking on that text will take you to the announcement grid page where you can see multiple options such as filters, actions, columns, etc.
To add a new announcement text, click on the Add New Announcement button shown above the grid on the right side.
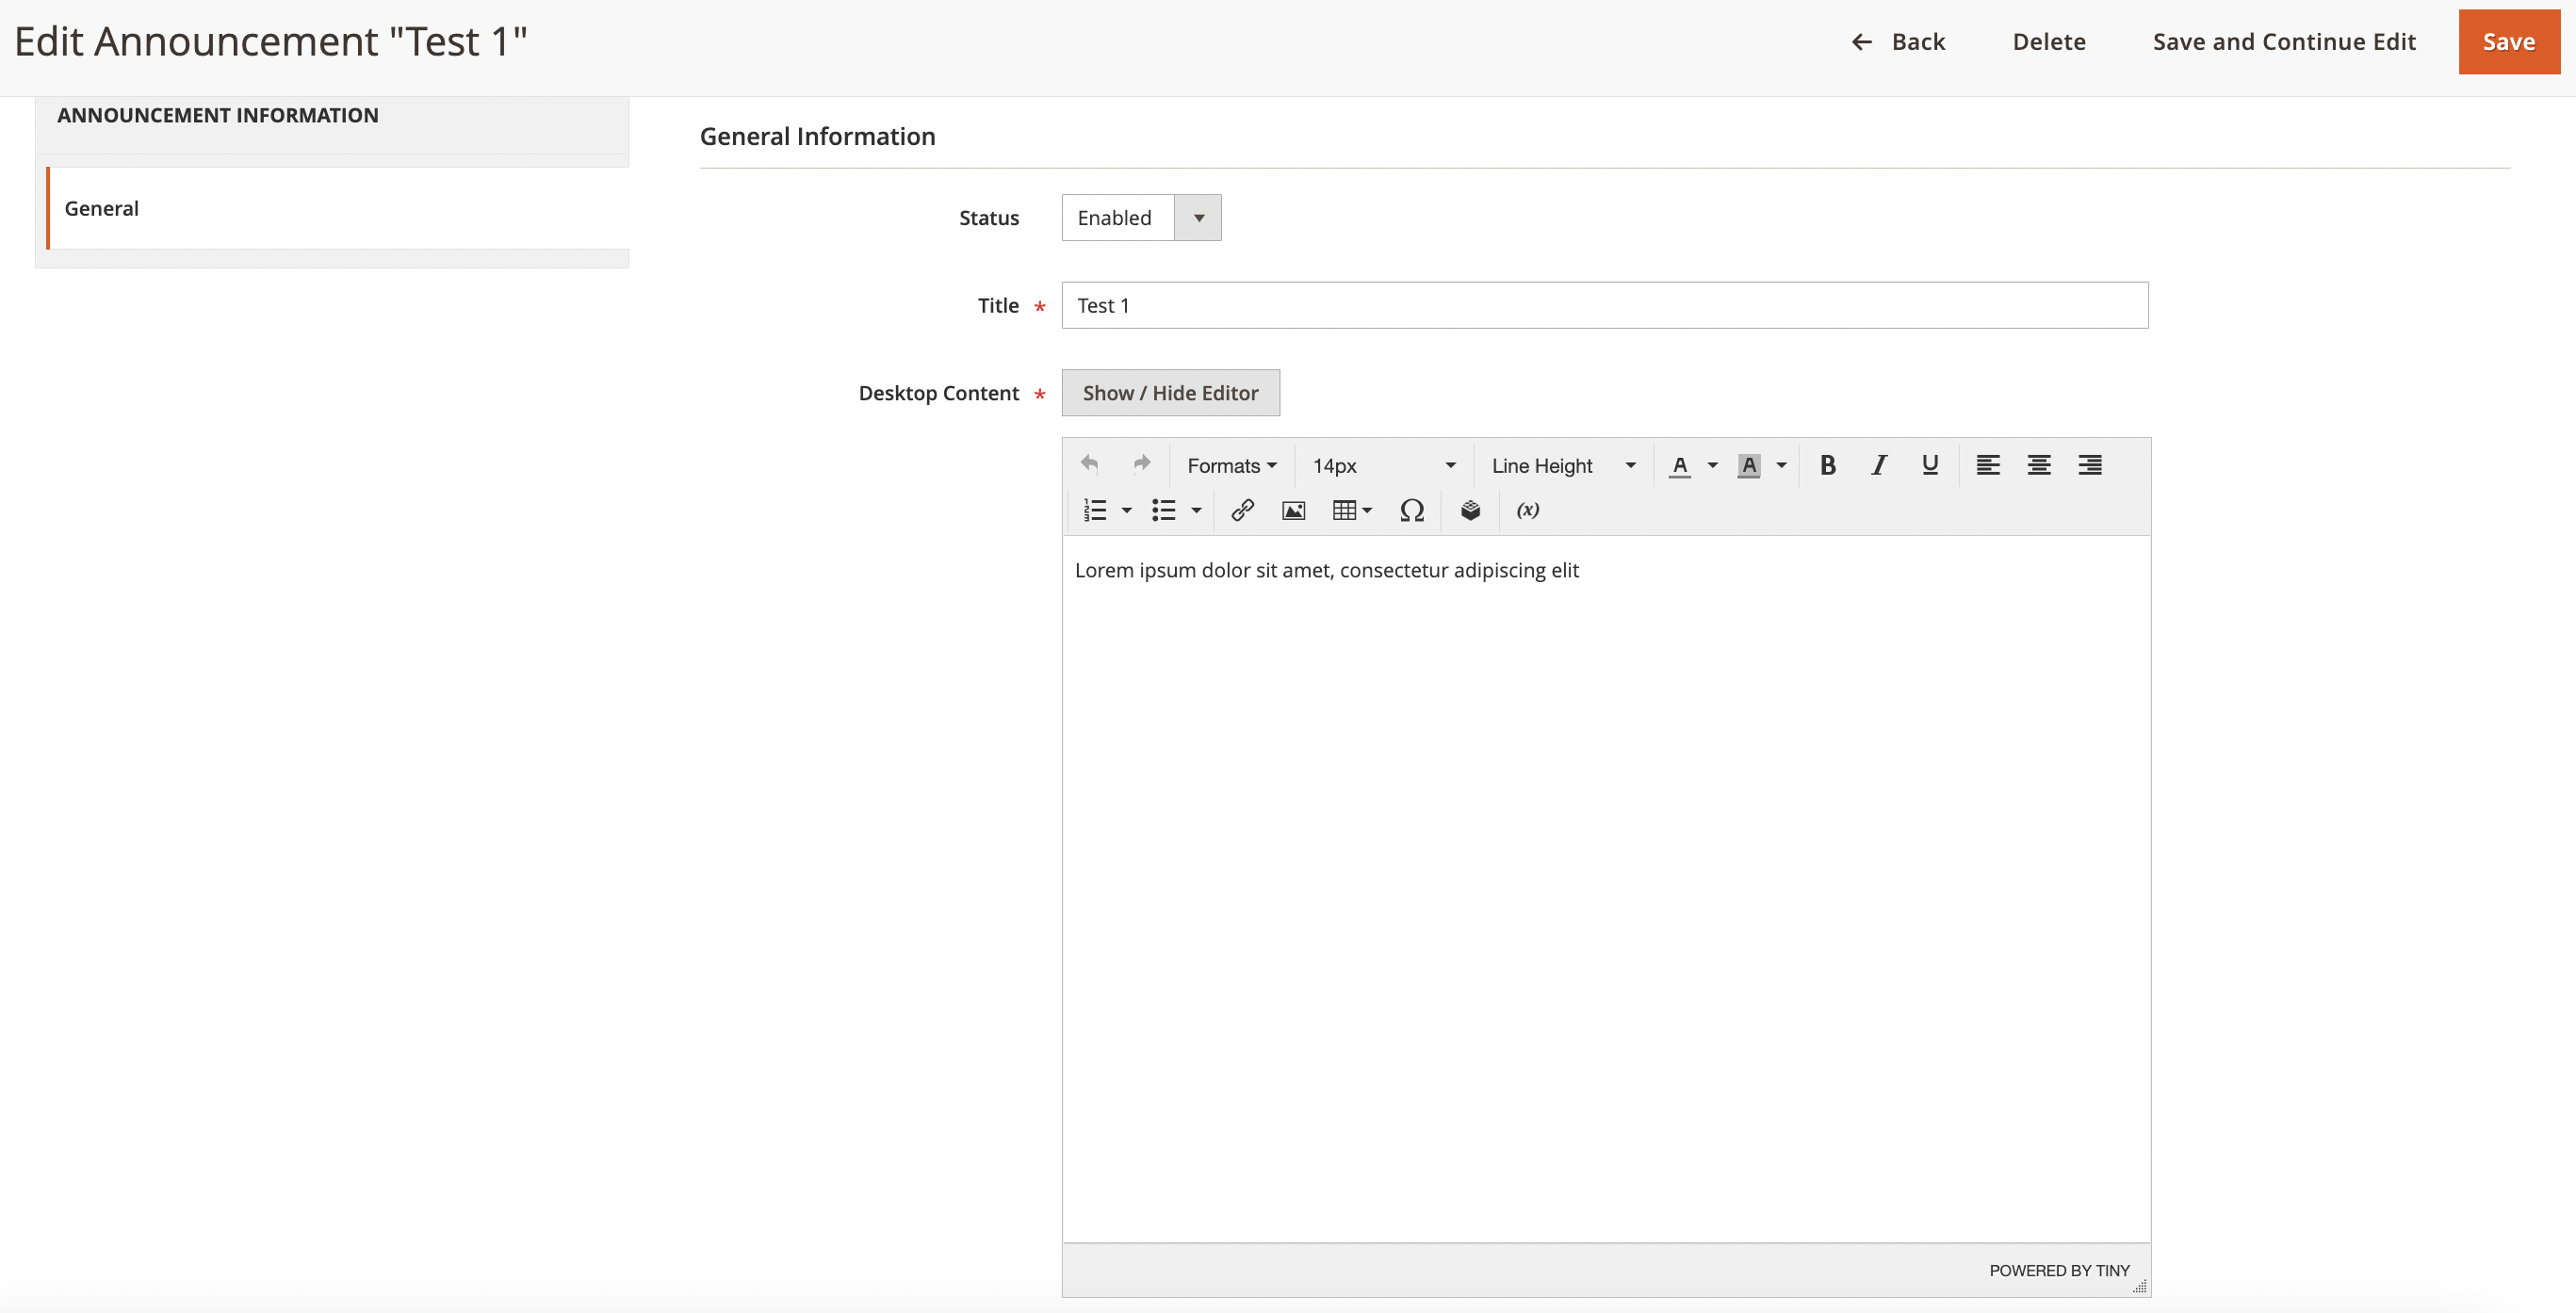
Hitting on that button will open the edit announcement page and shows the list of fields. Please find the description of each field below -
-
Status: By default, this field comes with Enabled option pre-selected. Keeping that option as it is will show this announcement text on the storefront. If this text becomes no longer an announcement to your online business, you can switch the option to Disabled.
-
Title: Enter the title of your announcement message in this field.
-
Desktop Content: Write down the announcement message to show for the desktop devices in this WYSIWYG editor. You can include the link in your text message.
-
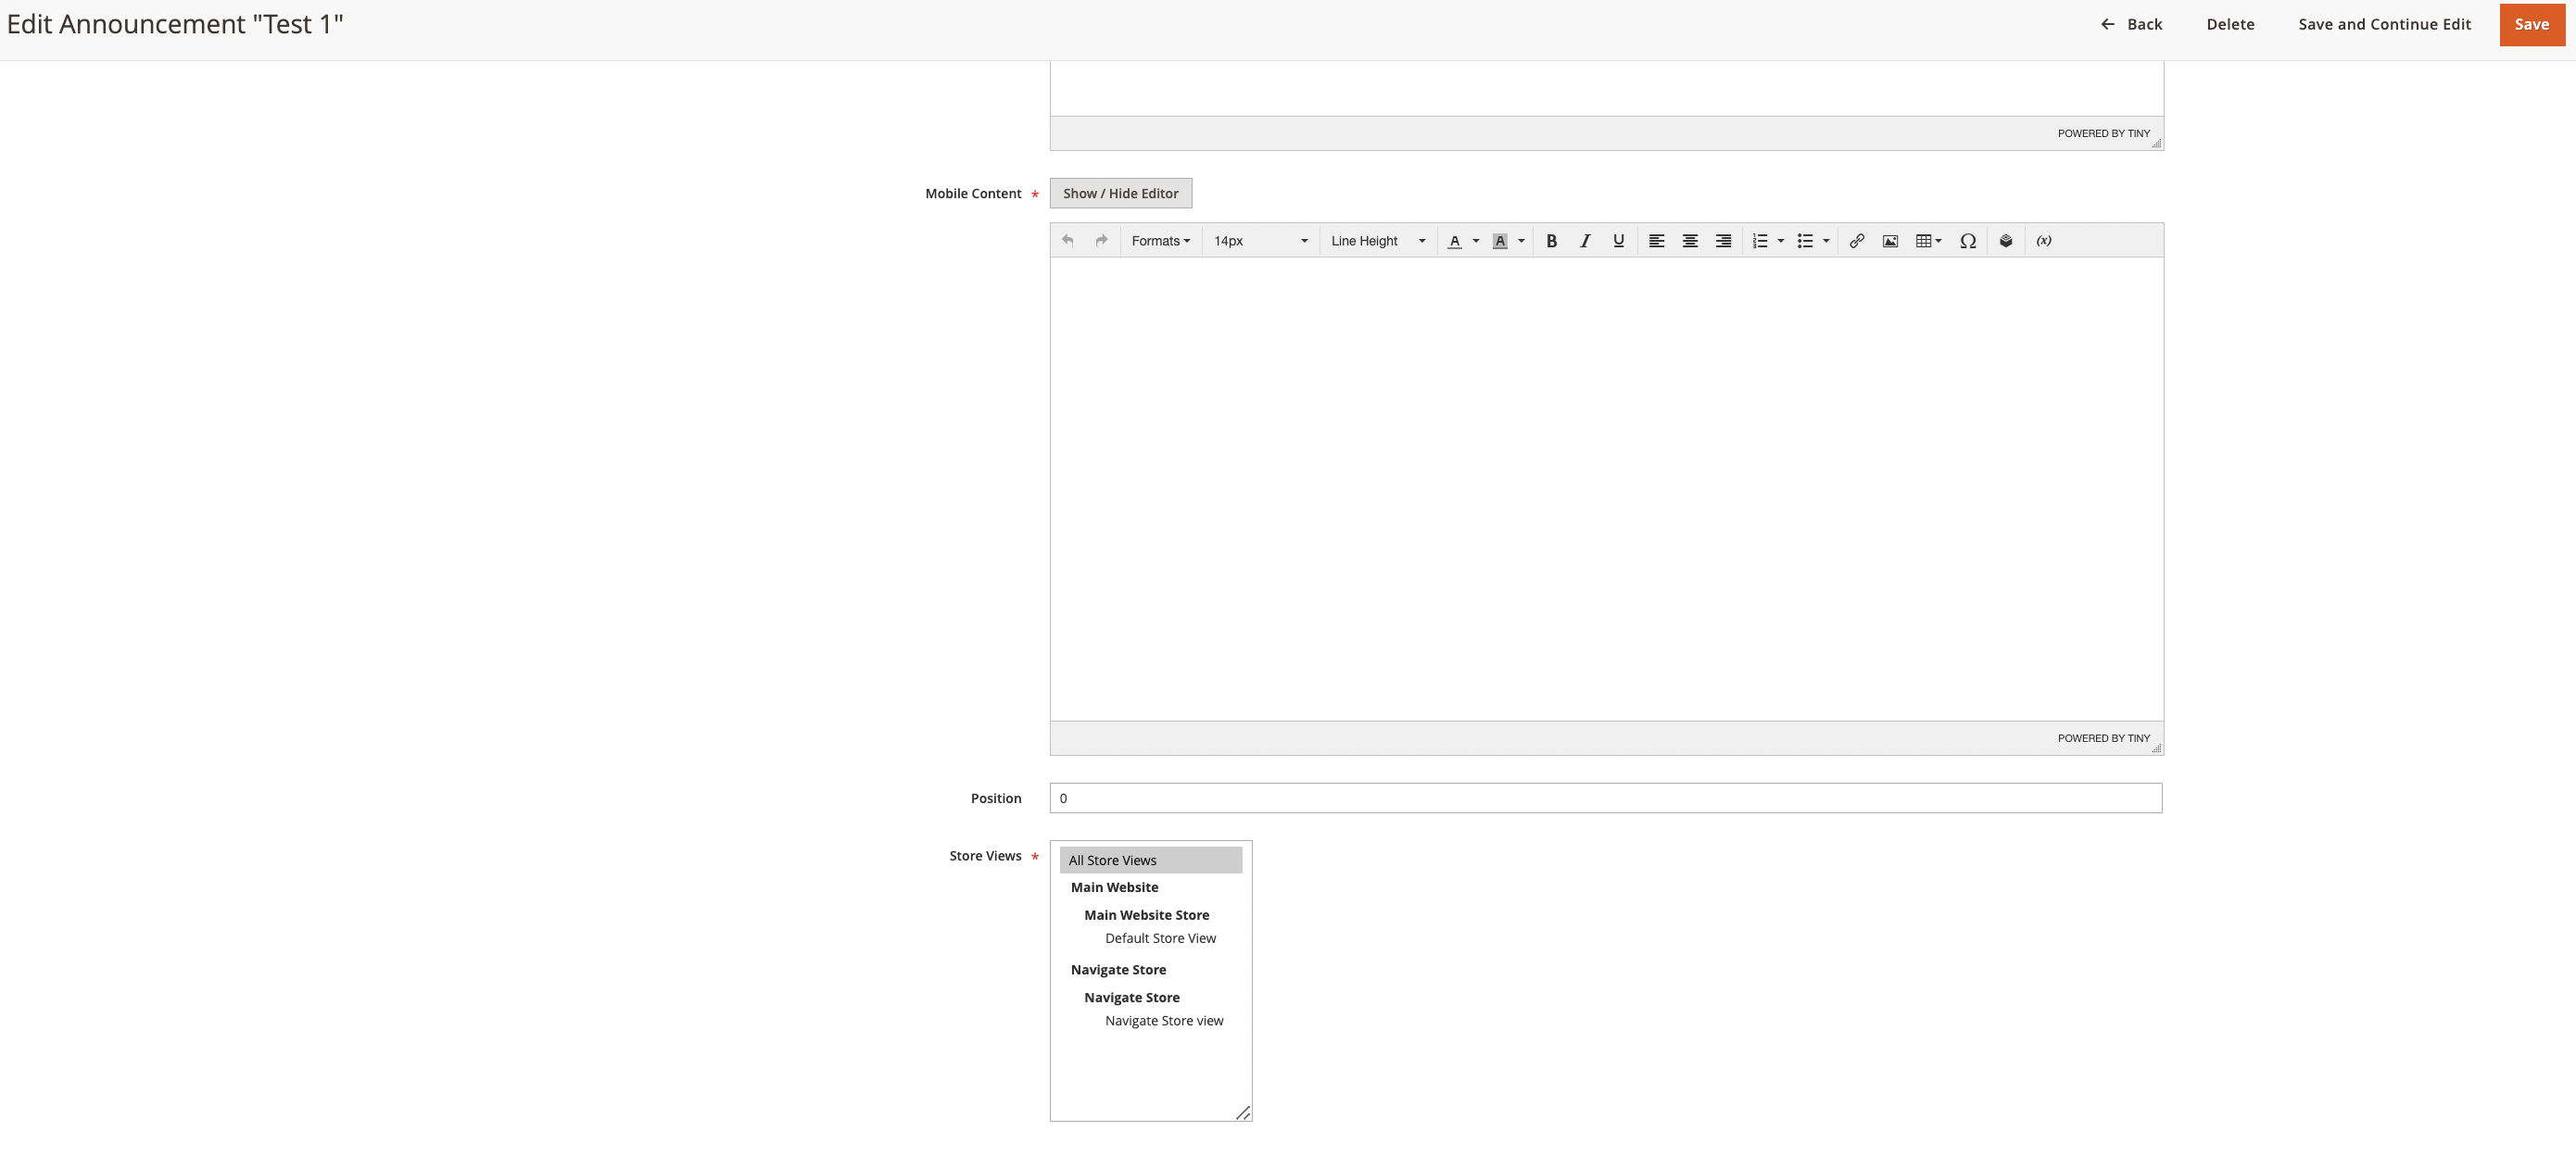
Mobile Content: Write down the announcement message specifically to show for the mobile devices in this WYSIWYG editor.
-
Position: Enter the number at which you want this announcement to appear. Entering 0 will put that announcement message on the top.
-
Store Views: Select the store view(s) from the list to show that announcement message only to those stores.
After entering all the details, please click on the Save or Save and Continue Edit button to save that announcement.
Once saved, perform the cache management and review all the announcements on the storefront above the logo.