How to configure Advanced Purchase Order extension
The below process explains you how to configure the extension in the backend and assess the features on the storefront.
Store Configurations
It is a page where you can configure the global settings of this module. Navigate to that page following this path and begin the configuration process as per your business requirement –
Store -> Configurations -> Navigate Extension -> Advanced Purchase Order -> General Configuration.
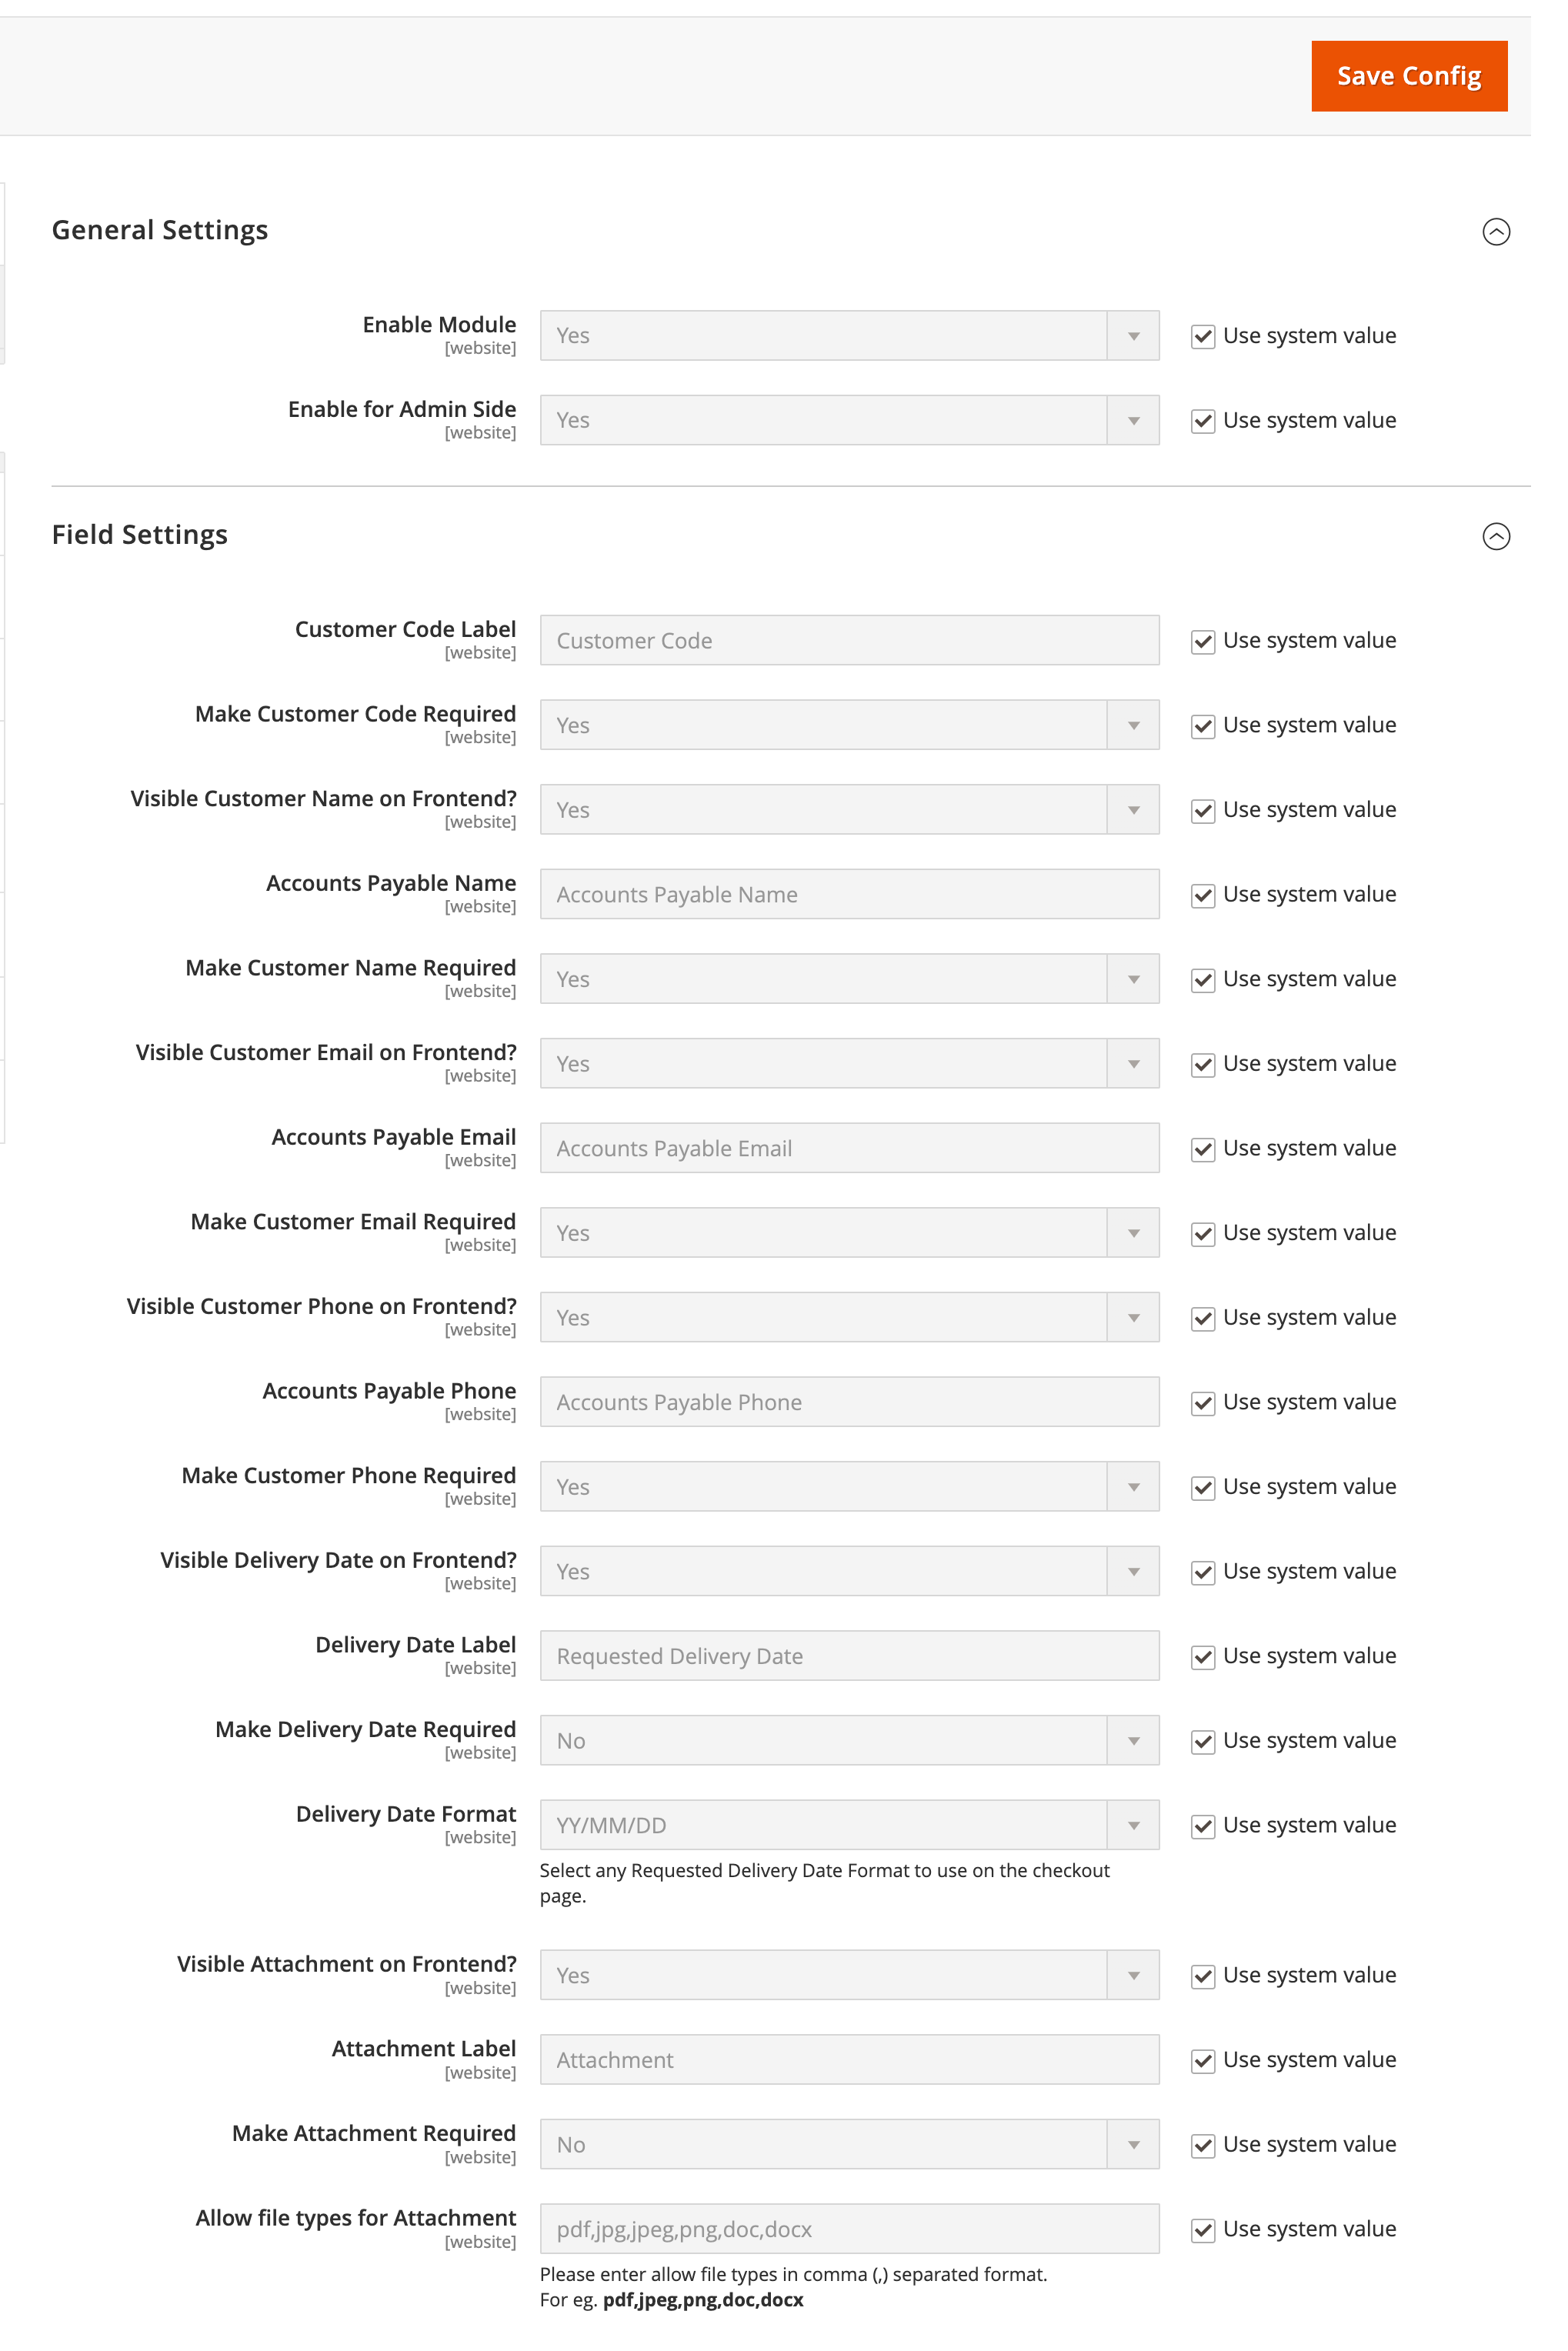
General Settings
- Enabled: Select Yes/No from the dropdown to enable/disable this module.
- Yes: Choosing this option will enable the module.
- No: Selecting this option will disable the module.
Please note that you MUST enable the default Purchase Order (PO) module to see the below module fields on the checkout page. This module dependes on that native Magento PO module and has developed with an aim to extend its native functionalities.
- Enable for Admin Side: Choose either Yes or No option if the admin wants to use this advanced purchase order payment method in the backend while creating an order.
Field Settings
- Customer Code Label: Amend the default “Customer Code” text to show it on the checkout page as per your business requirement.
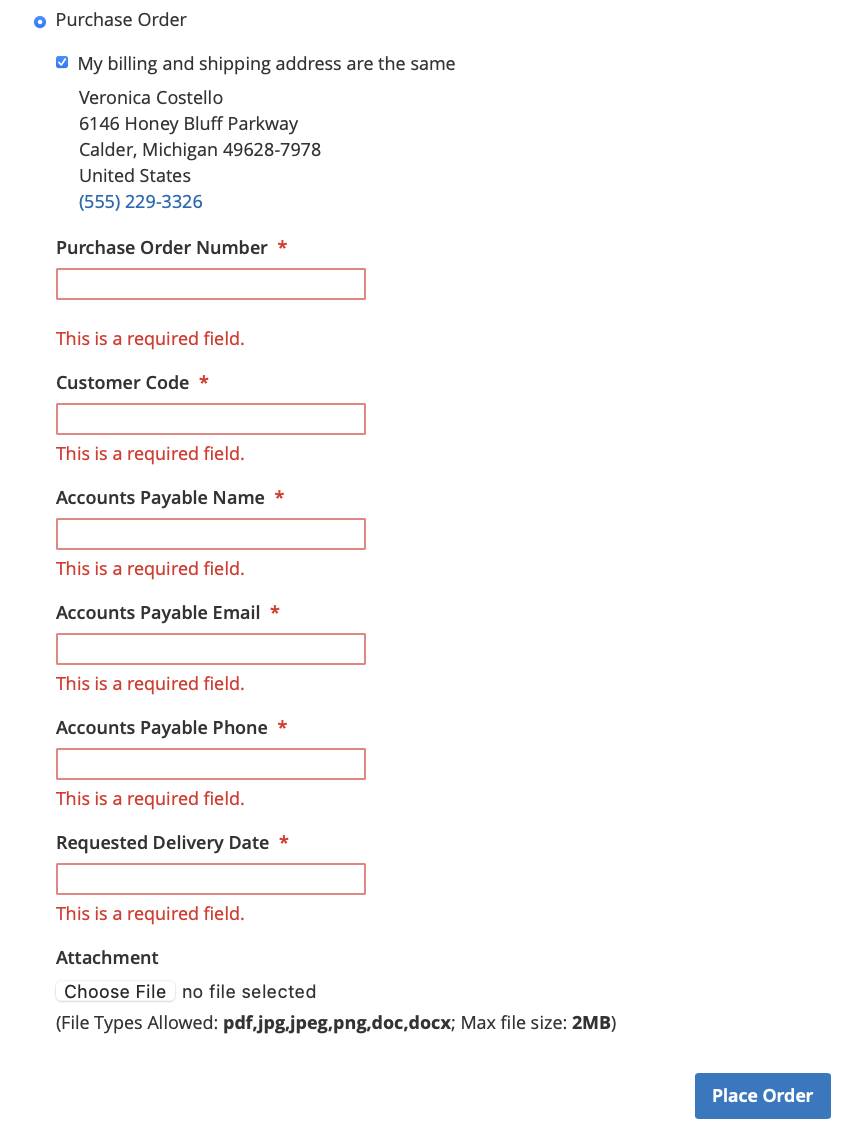
- Make Customer Code Required: Select “Yes” or “No” to make “Customer Code” field required.
- Visible Customer Name on Frontend?: Show/Hide “Customer Name” field on the checkout page.
- Accounts Payable Name: Change the default "Accounts Payable Name" text to show it on the checkout page as per your business requirement.
-
Make Customer Name Required: Select “Yes” or “No” to make the “Customer Name” field required.
-
Visible Customer Email on Frontend?: Show/Hide “Customer Email” field on the checkout page.
- Accounts Payable Email: Change the default "Accounts Payable Email" text to show it on the checkout page as per your business requirement.
-
Make Customer Email Required: Select “Yes” or “No” to make the “Customer Email” field required.
-
Visible Customer Phone on Frontend?: Show/Hide “Customer Phone” field on the checkout page.
- Accounts Payable Phone: Change the default "Accounts Payable Phone" text to show it on the checkout page as per your business requirement.
-
Make Customer Phone Required: Select “Yes” or “No” to make the “Customer Phone” field required.
-
Visible Delivery Date on Frontend?: Show/Hide “Delivery Date” field on the checkout page.
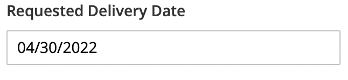
- Delivery Date Label: Allows the admin to change the default “Requested Delivery Date” text.
- Make Delivery Date Required: Enable/Disable the “Requested Delivery Date” field required by selecting either “Yes” or “No” value.
- Delivery Date Format: Select the delivery date format as per your region. There are three (3) delivery formats offered by this module. Please find them below.
- YY/MM/DD
- DD/MM/YY
- MM/DD/YY
- Visible Attachment on Frontend?: Show/Hide “Attachment” field on the checkout page.
- Make Attachment Required: Select “Yes” or “No” to make the “Attachment” field required.
- Attachment Label: Allows the admin to change the default “Attachment Label” text.
- Allow File Types For PO Attachment: Add various file types in comma separated format to allow the user to upload the document on the checkout.
- pdf,jpg,jpeg,png,doc,docx – These are the different file types that this module offers to choose from. You can mention either all or any specific format(s) for you customers.
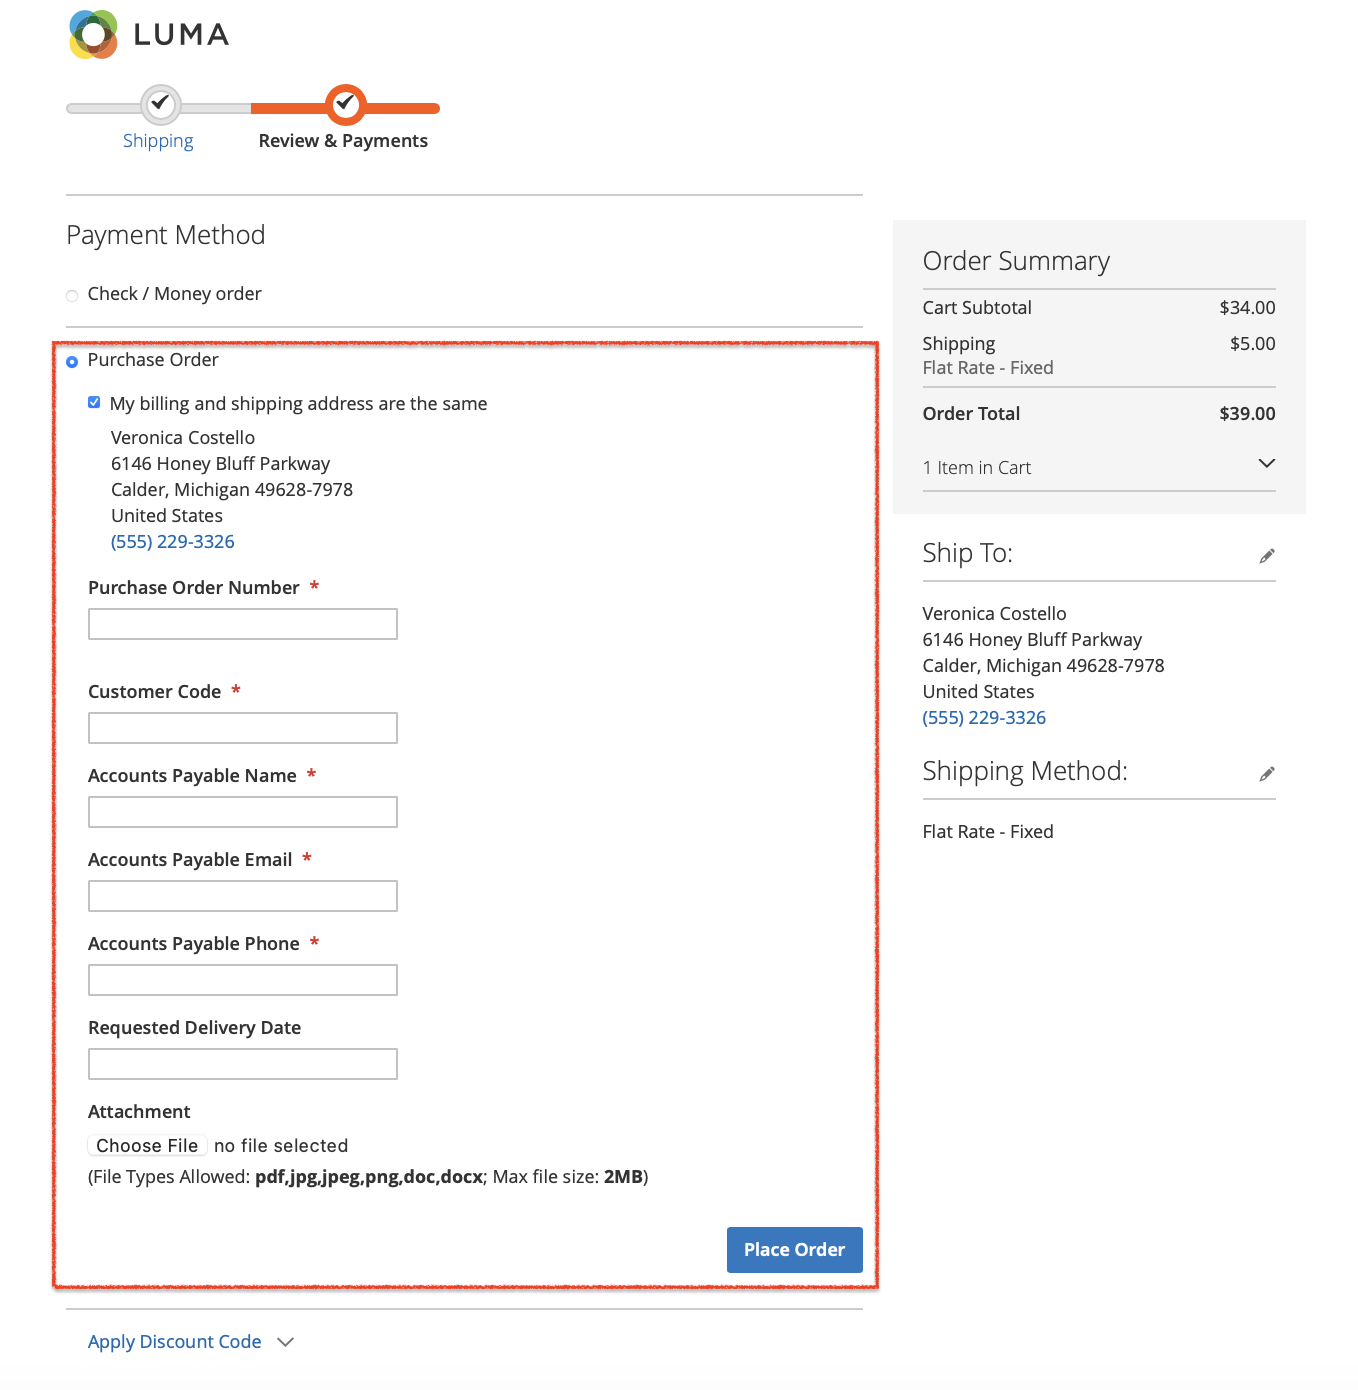
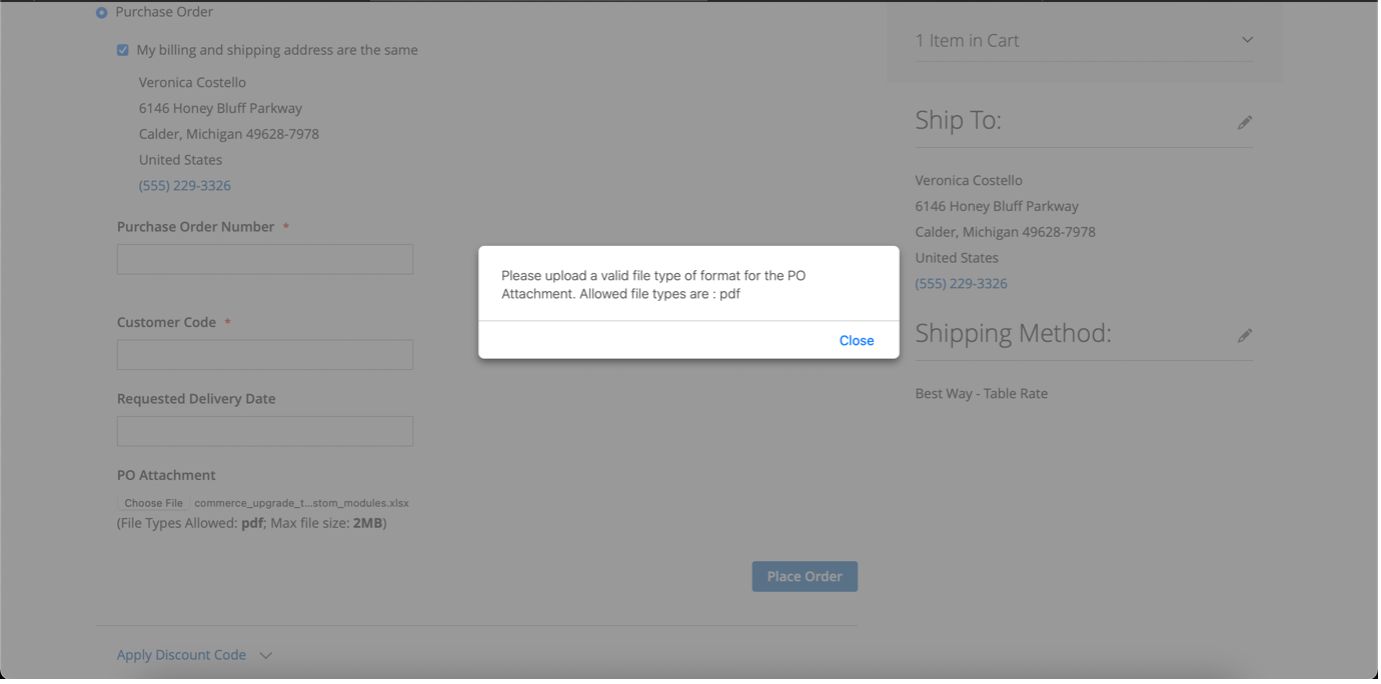
Storefront
The below information would demonstrate how this module would work on the frontend.
- Checkout Page: After configuring the settings as per your requirement, navigate to the checkout page and experience them working seamlessly. See the below screenshot exhibiting the outcome of settings configured in the backend.

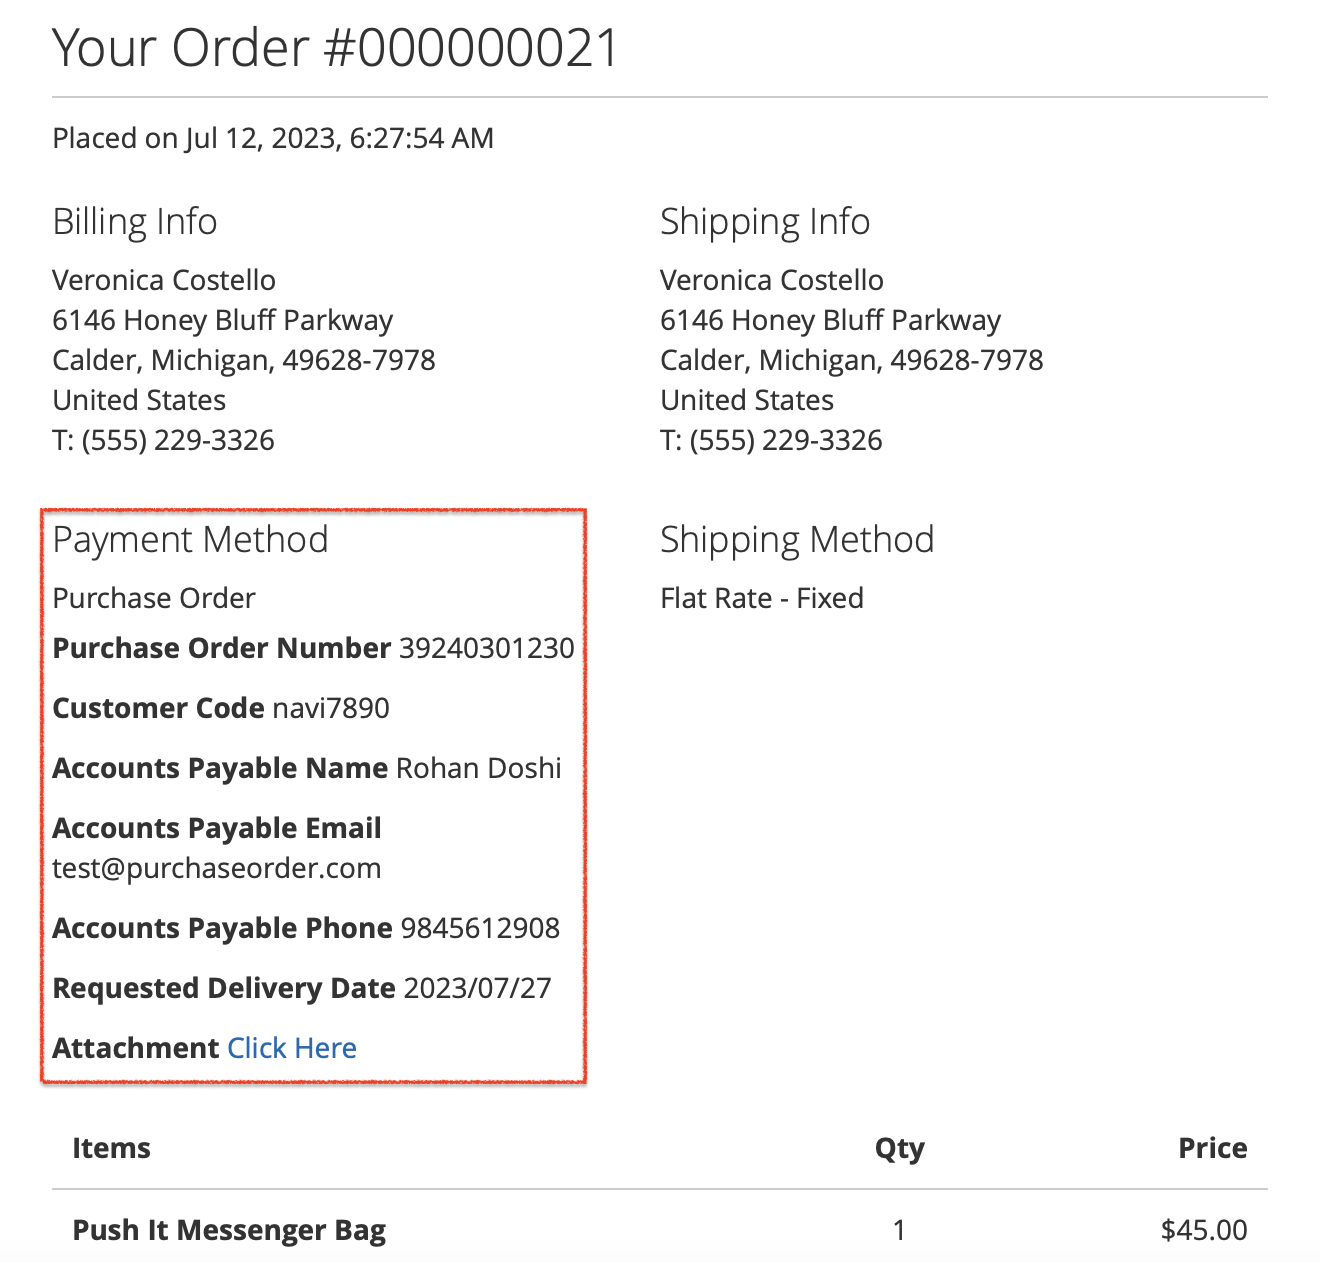
Order Edit Page
This section explains where you can review the Advanced Purchase Order details in the order edit page.
- Order Edit Page: the admin can review the details of PO in this order edit page that the customer has entered while placing an order.
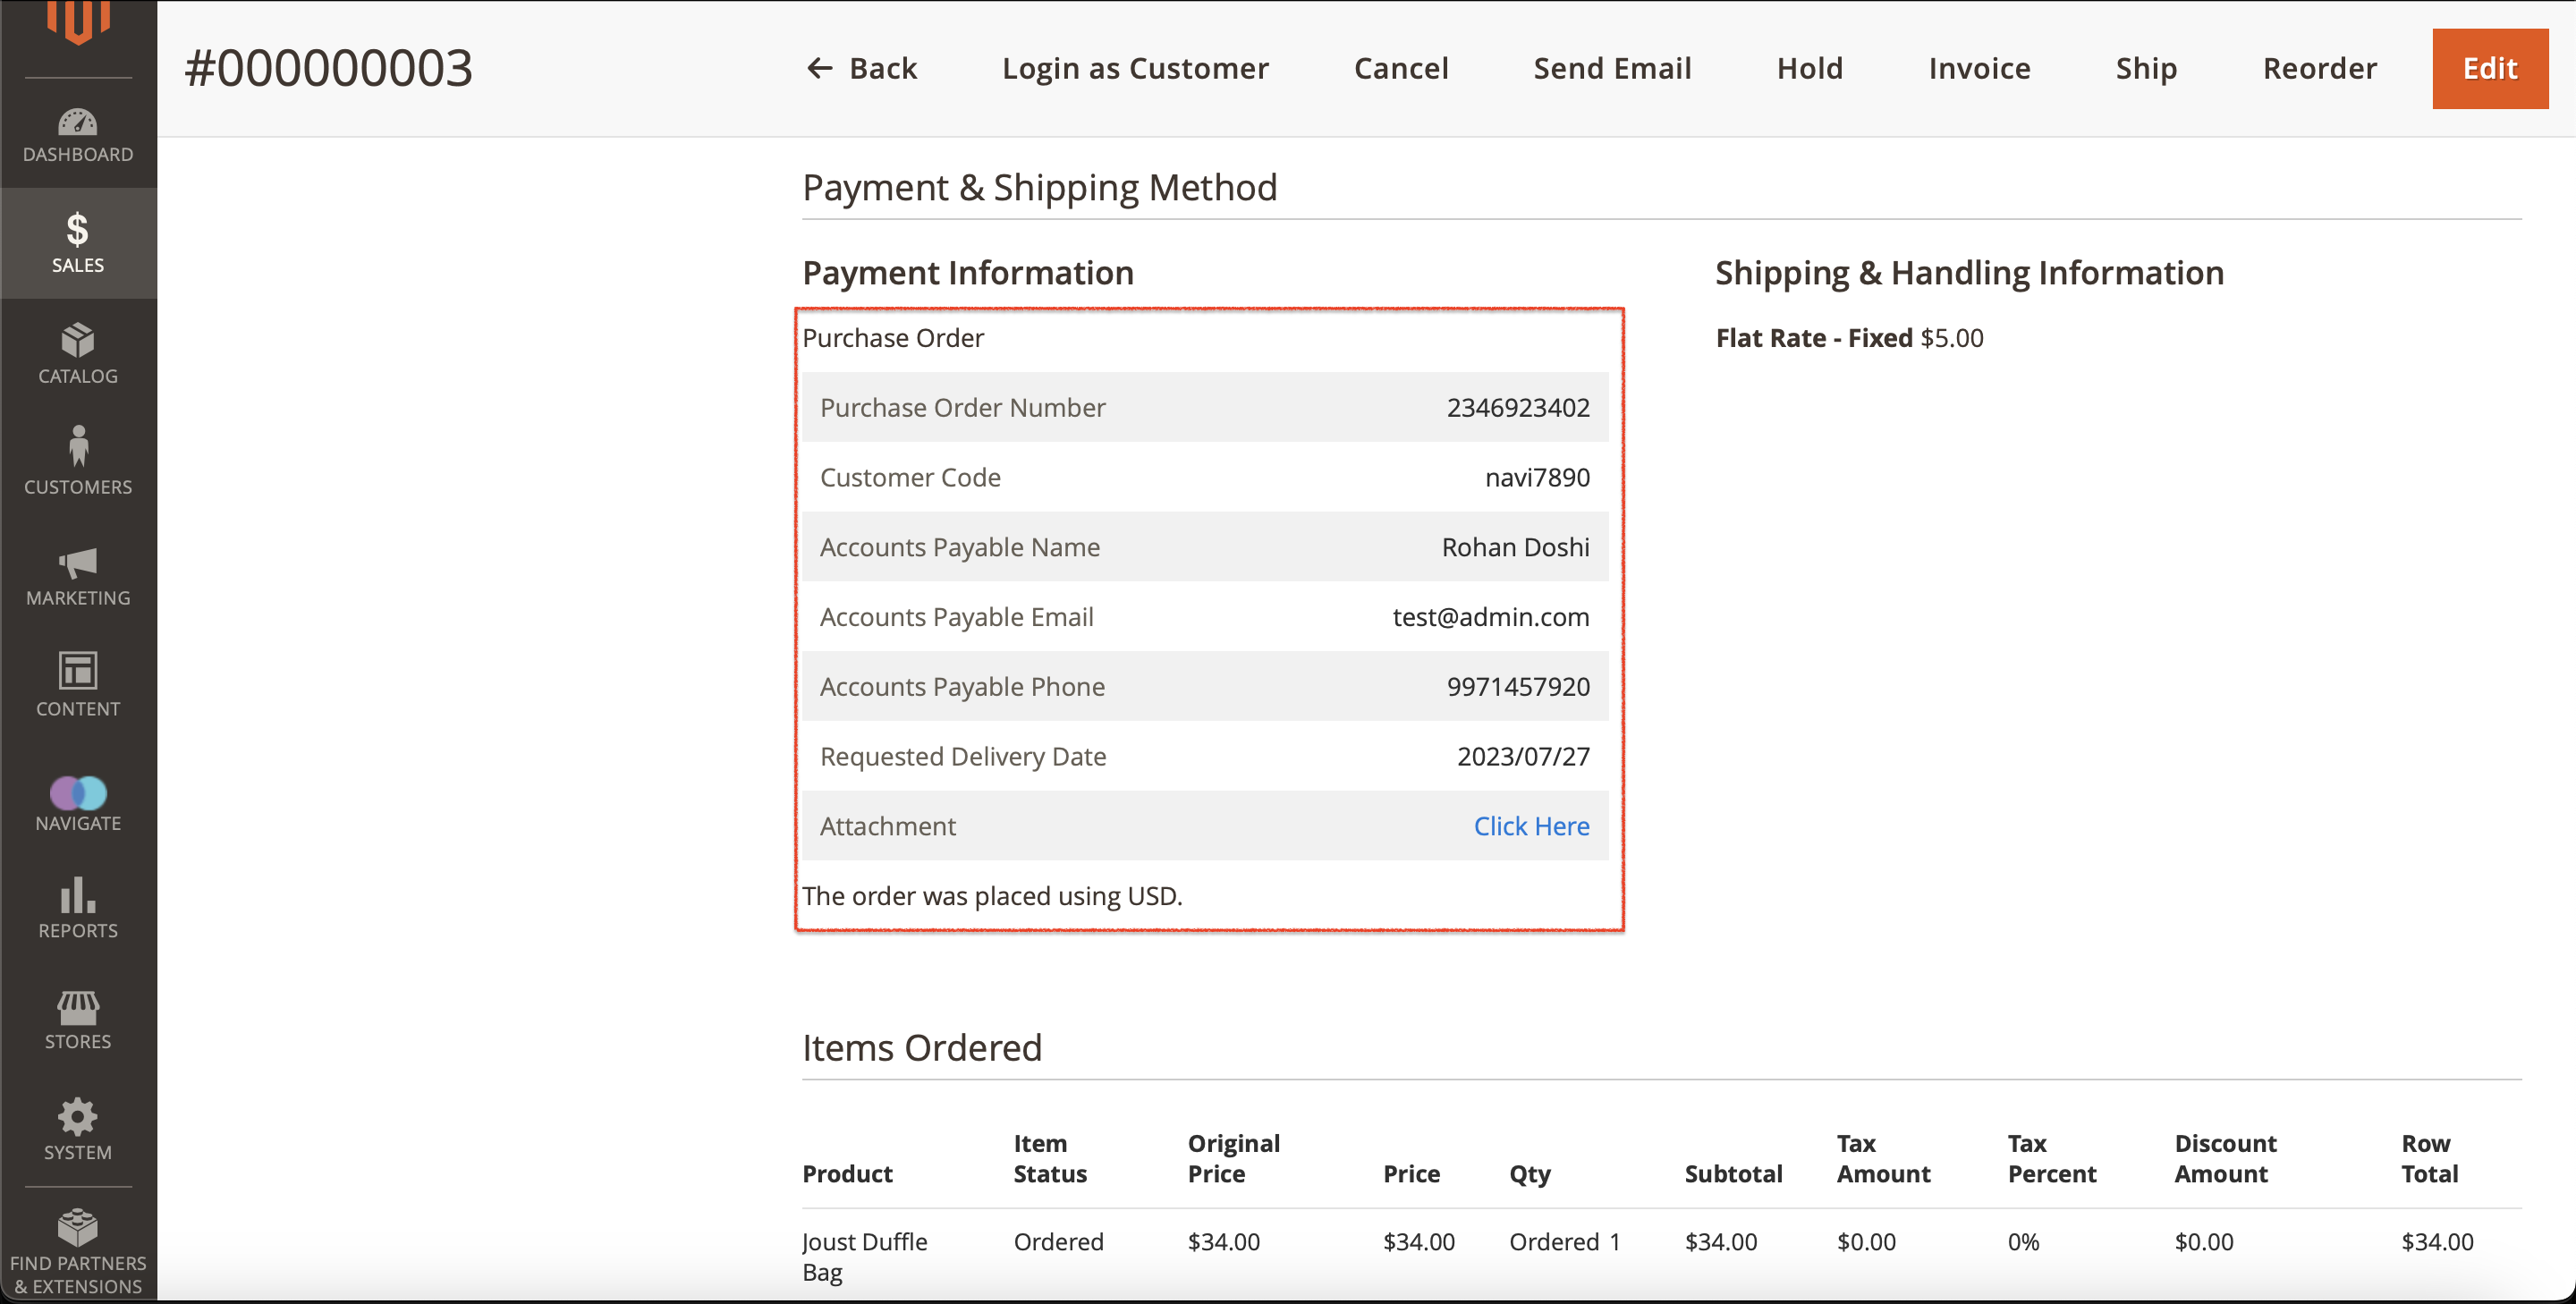
- PO Attachment link: The admin can also review the document by clicking on the “Click here” link that the customer has uploaded while checking out.
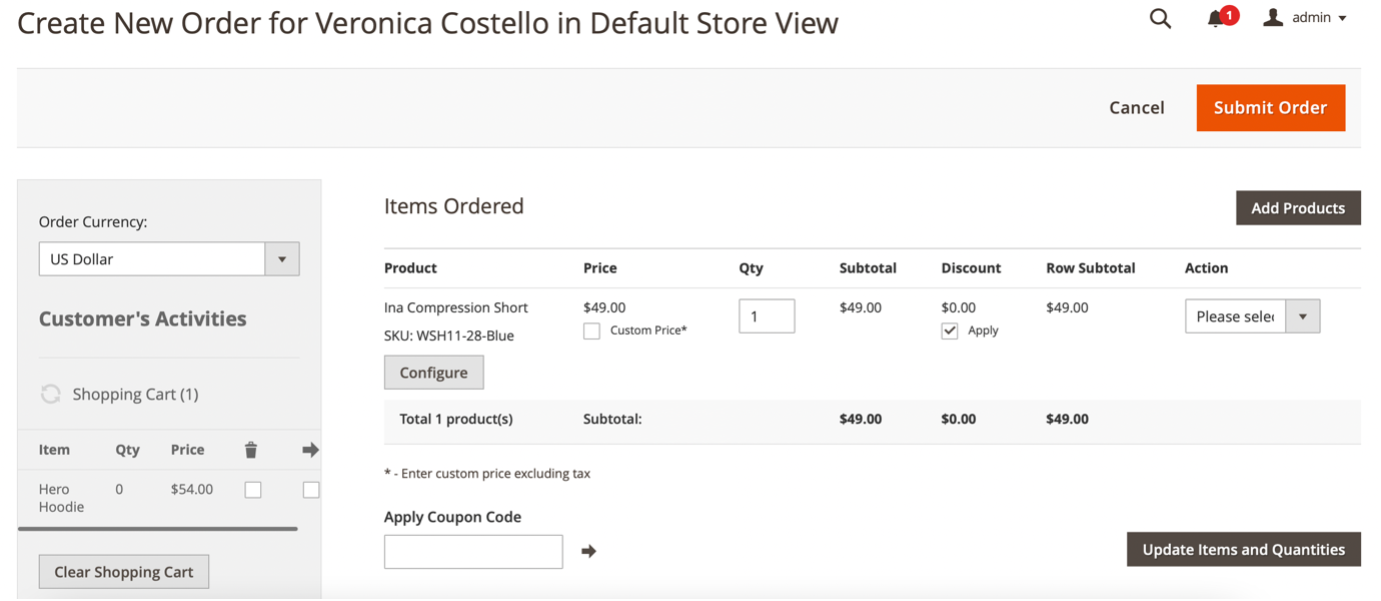
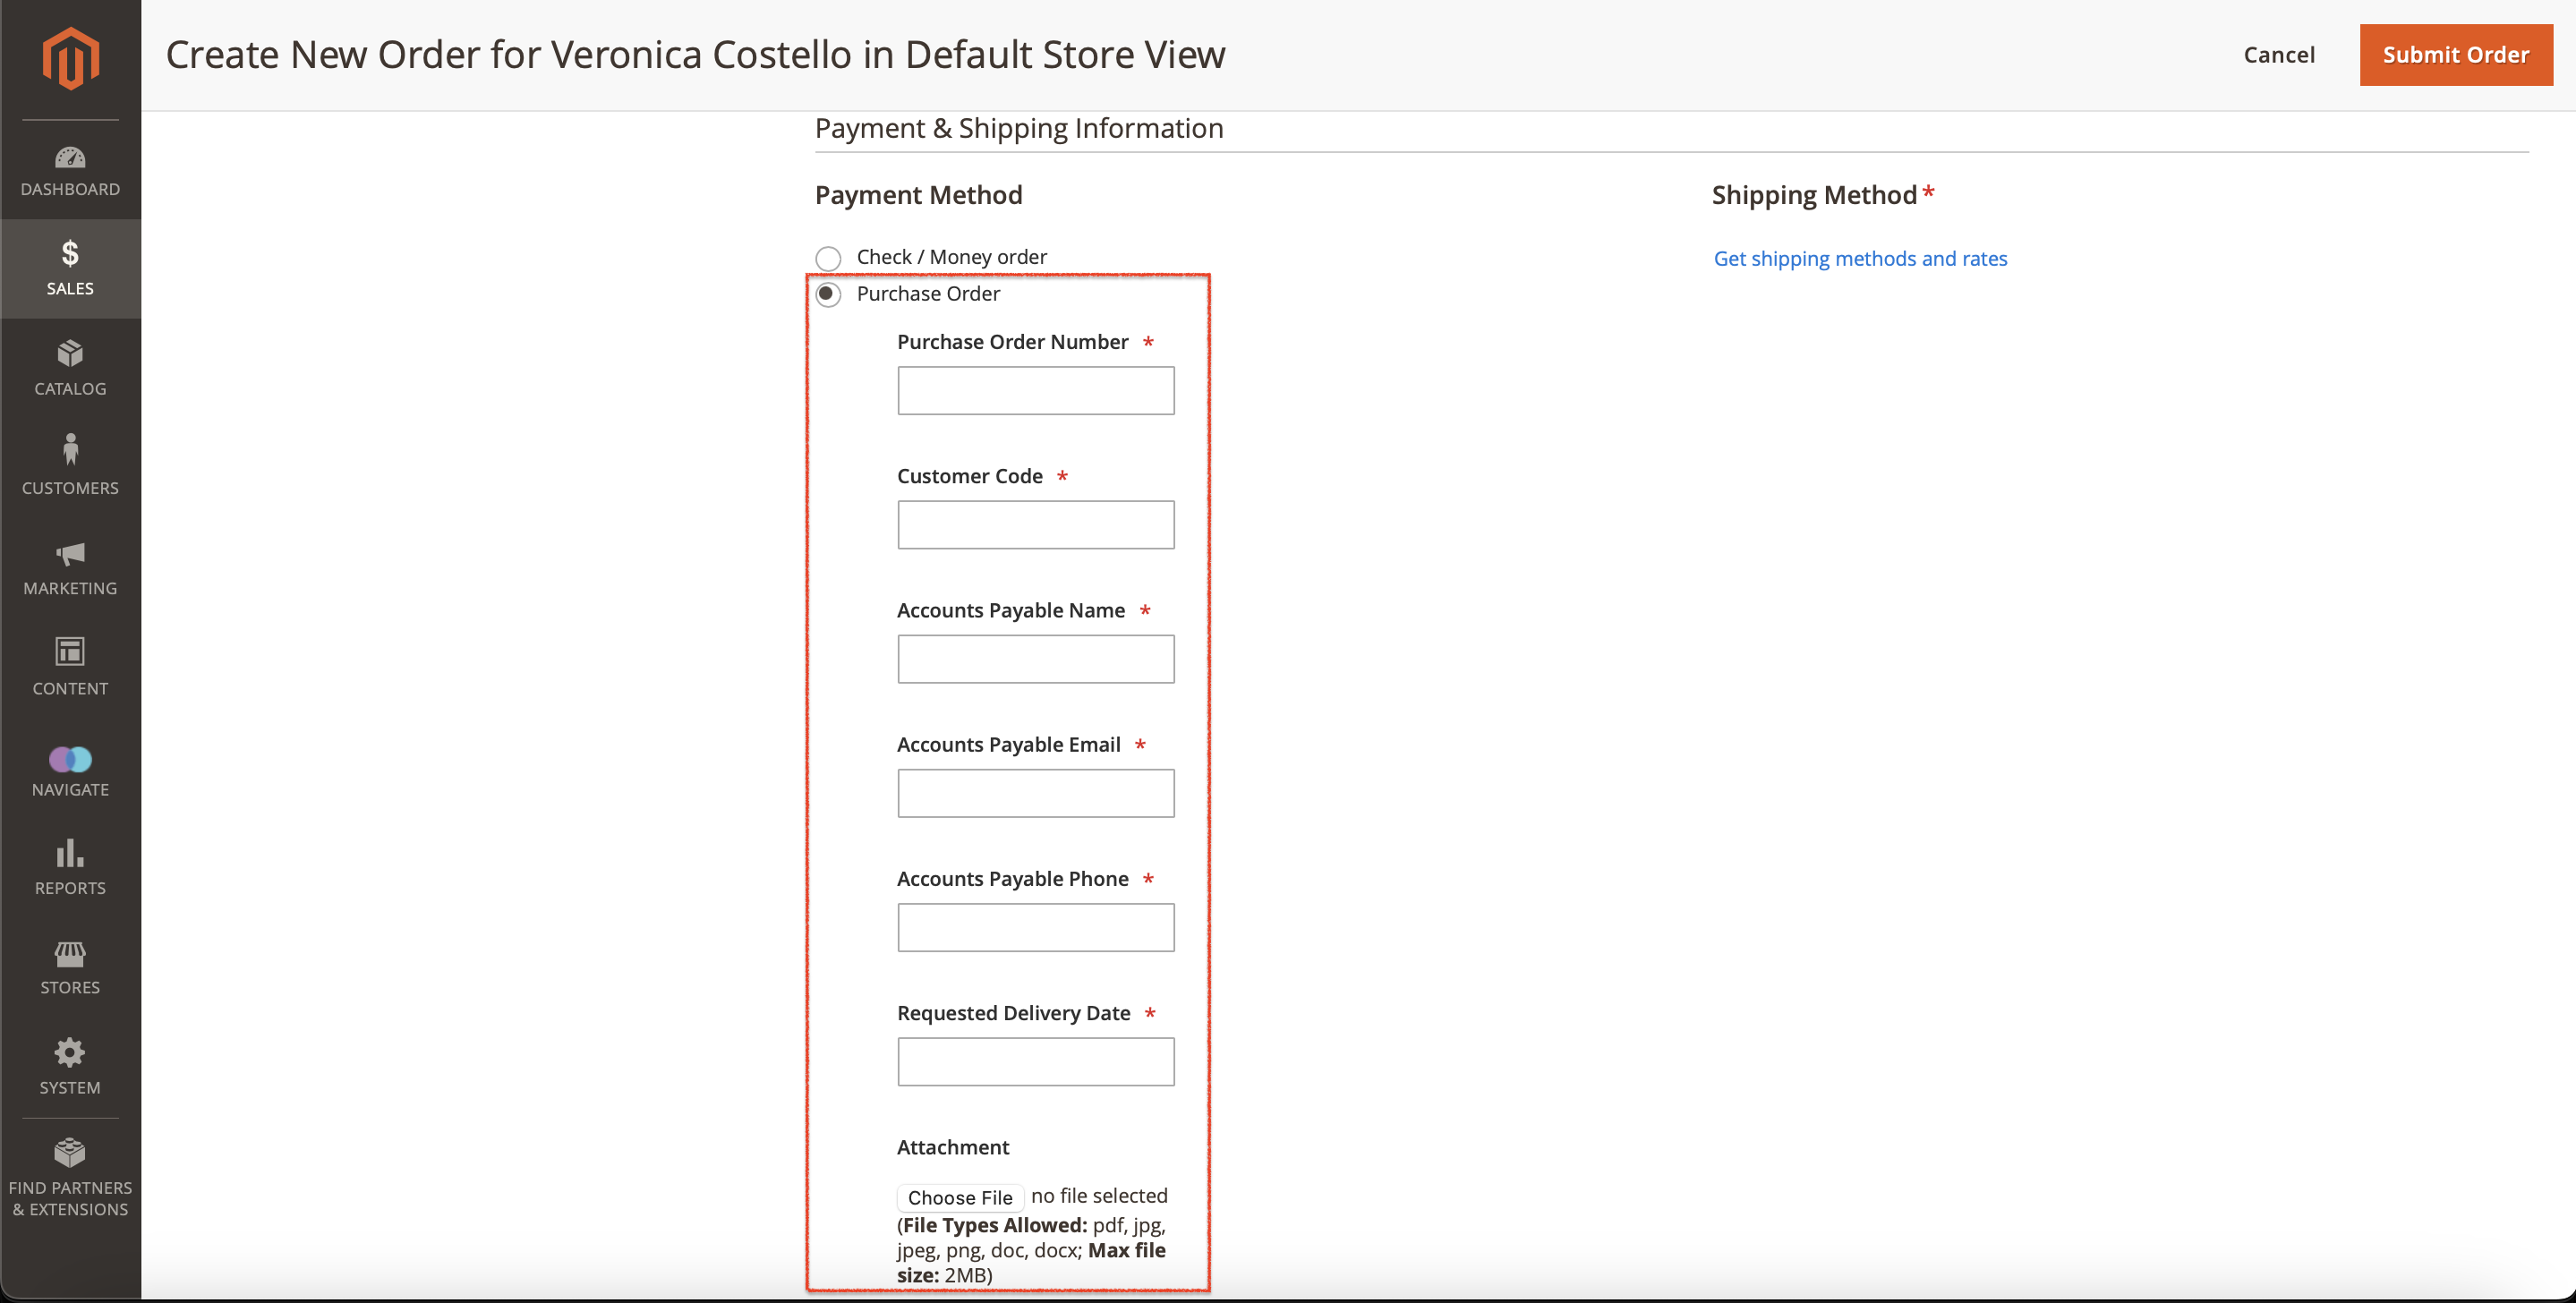
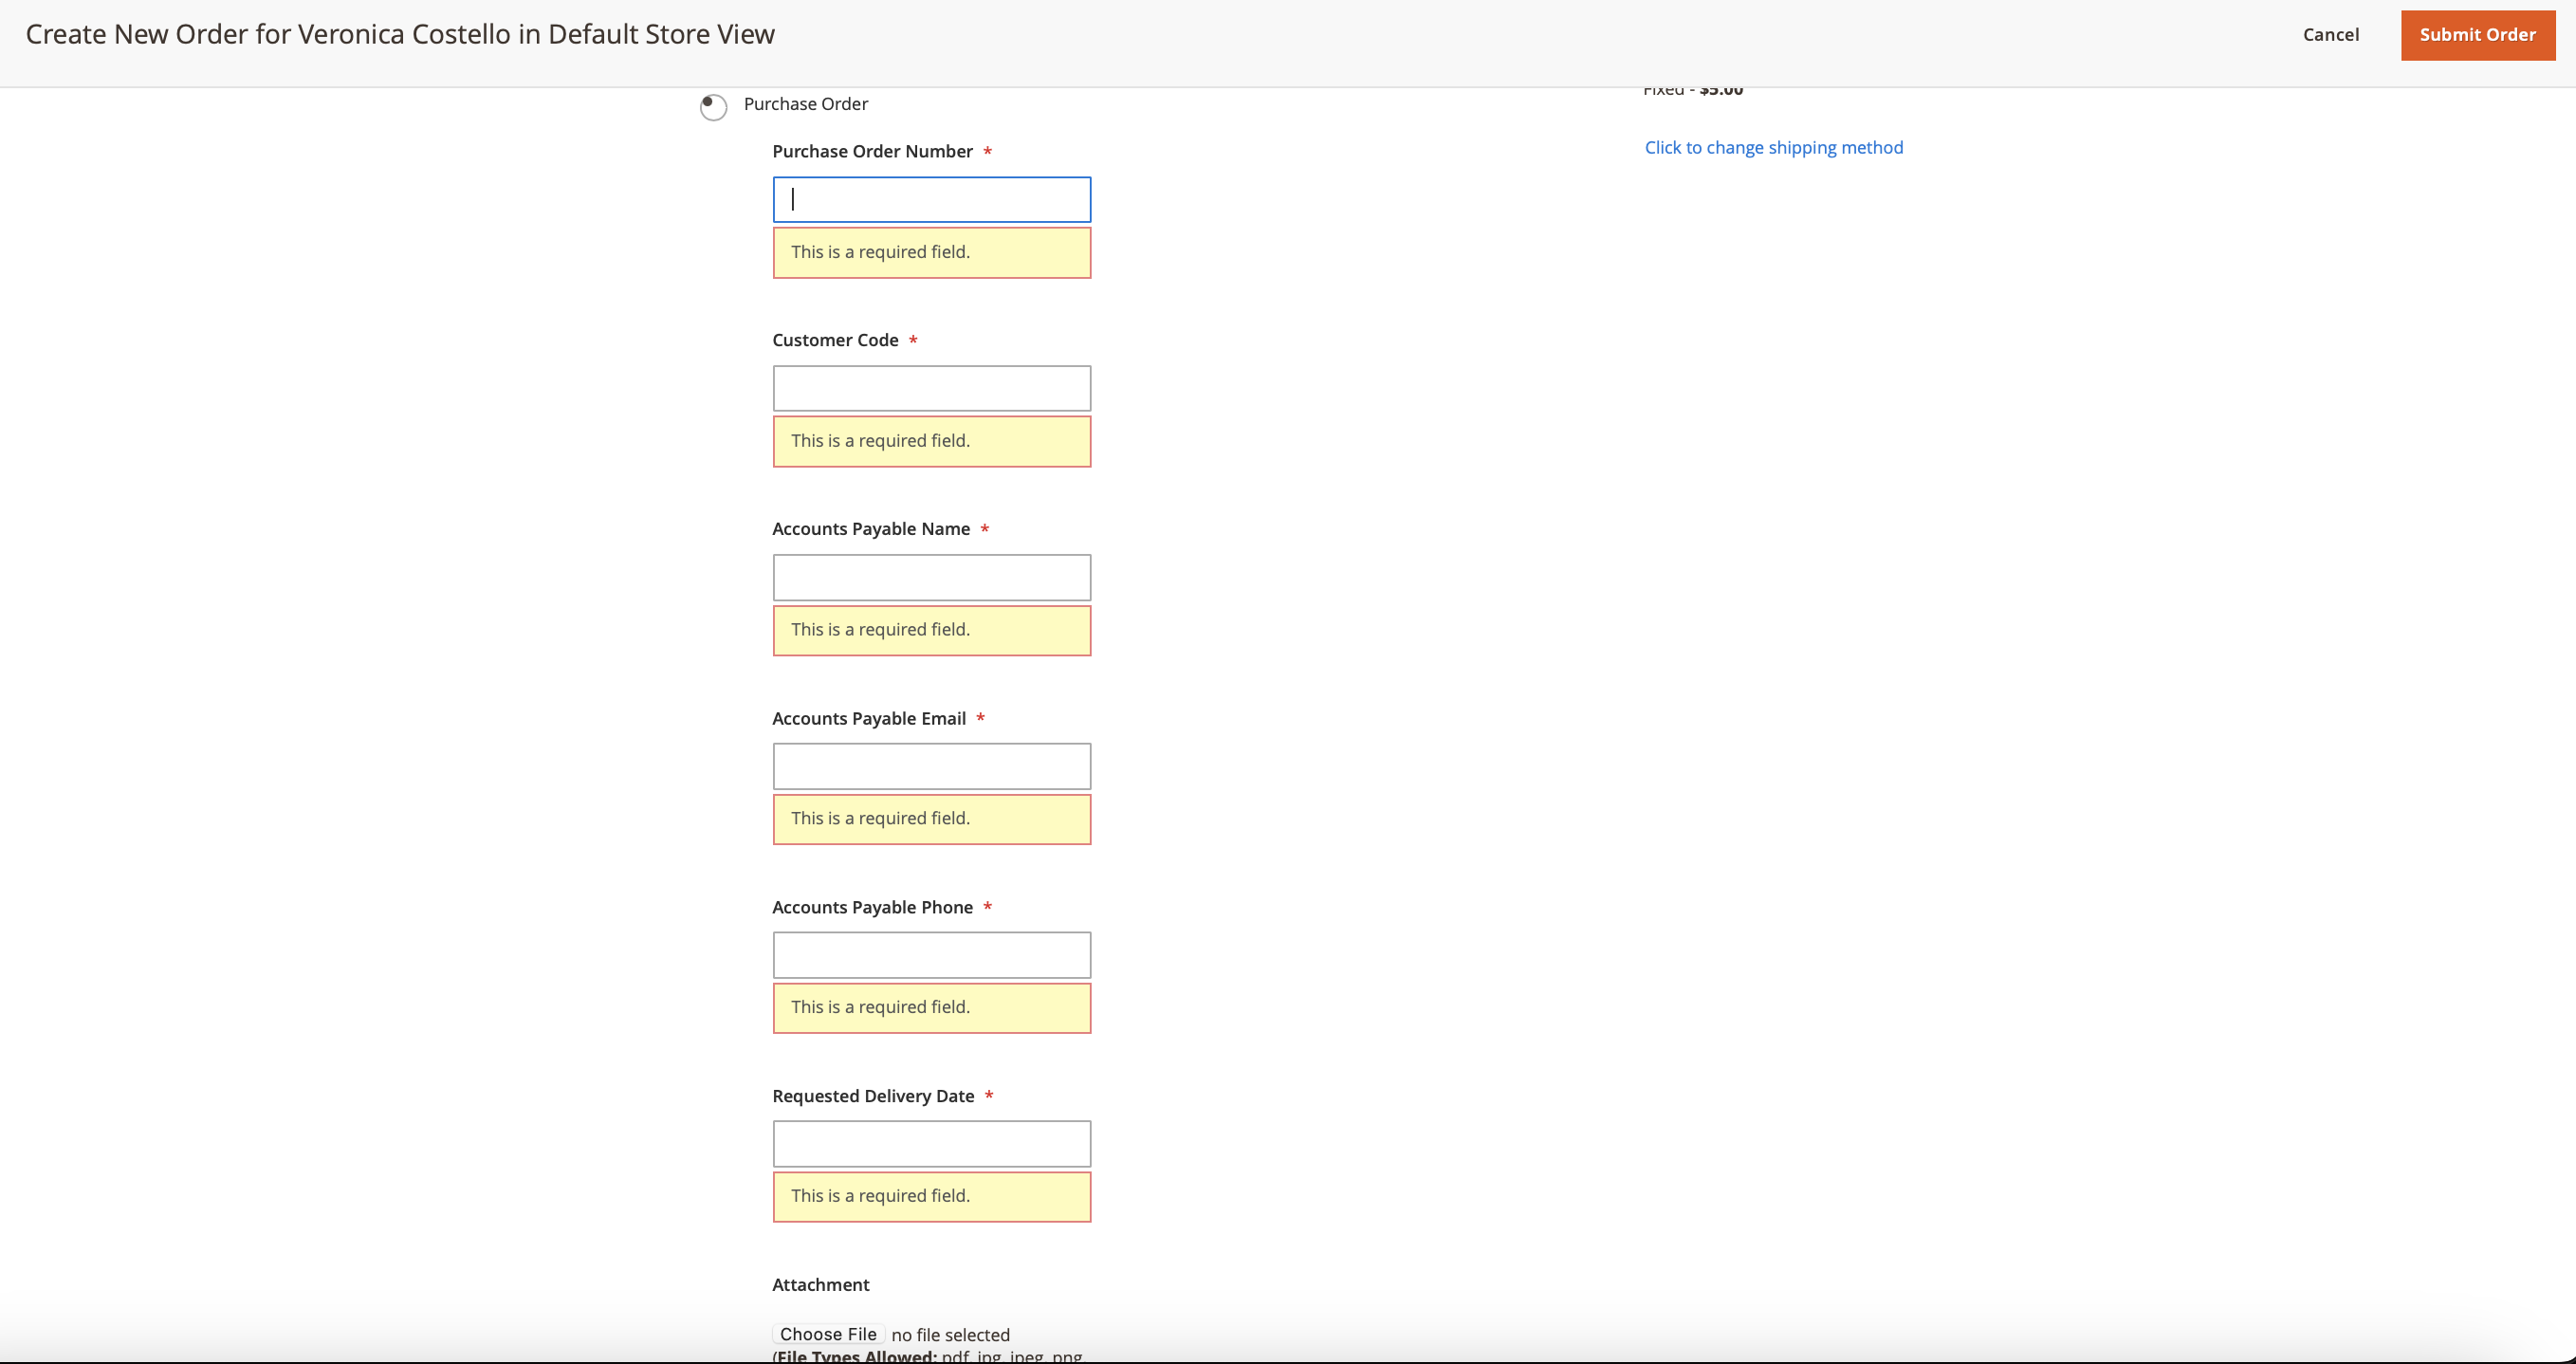
Place An Order From The Backend
Go through the below steps to place an order using the Advanced Purchase Order payment method from the backend.
- Let’s first place an order by enabling the “Enable For Admin Side” setting shown on the module’s global configuration page.

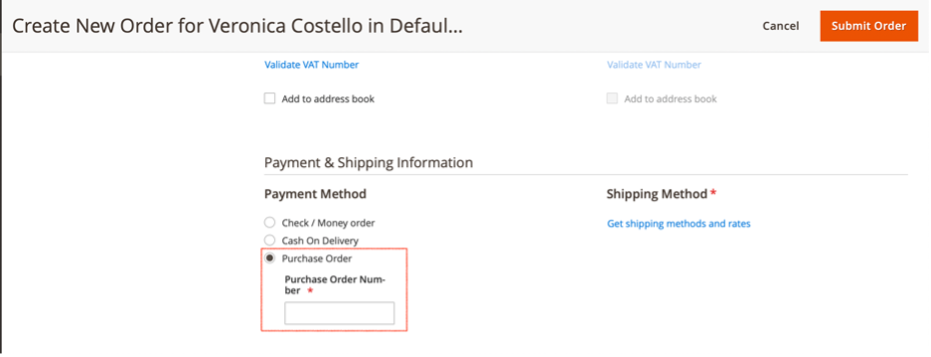
- Now, let’s navigate back to the global configuration page and disable this module for the backend. So, the admin won’t see any of those PO fields in the backend while creating an order on behalf of the customer.

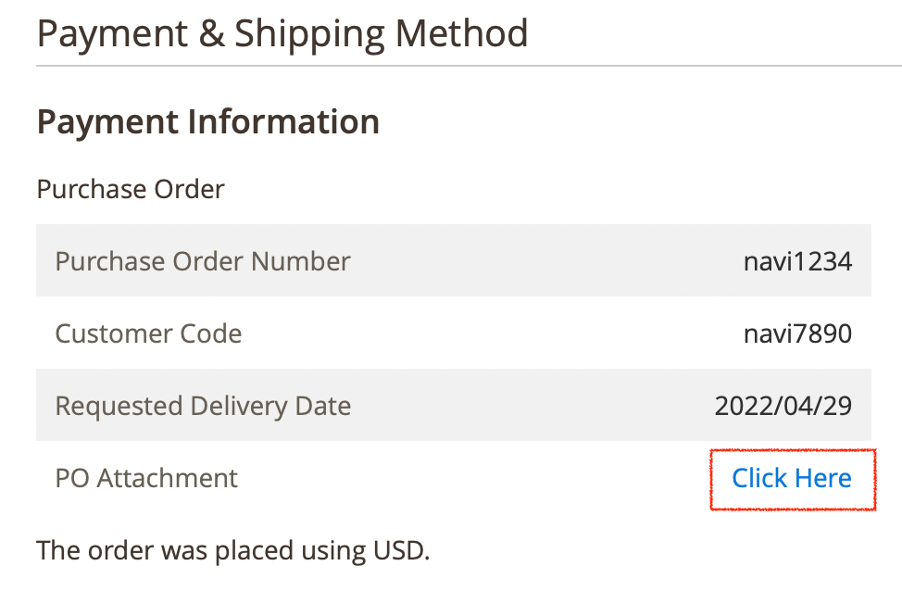
Sales Emails
As we all know, after placing an order, Magento sends the order confirmaion email to the customer. Considering this workflow, this Advanced Purchase Order module made it fully compatible with the default order confirmation email template. So, your customers could see all those purchase order details in the order confirmation email that they receieve from Magento. Have a look at the below screenshot.